
Journal
Pint-Sized Projects

For the past 3 years, I’ve been working on large Stitched Paintings. As much as I love these embroideries, they are big projects and often take months to complete. A month or so ago, I thought I would try — one more time — to figure out how to work on pint-sized projects that don’t take a year and a day!
My first attempt

Working on smaller projects should not be a big deal. Right? Well… that depends. To explain, I’ll go way back to my first large Stitched Painting. Before I painted the full-size image for StarFlower 1, I painted up a couple of smaller versions to test out some color ideas.

When I was contemplating participating in a gallery show, some of my art friends encouraged me to make some smaller pieces for sale. Which makes sense. Not everyone has the funds to purchase a large piece of art.
Without thinking about it too much, I pulled out one of the small versions of StarFlower 1 and started stitching.
But here’s the deal… I was Not Happy working on this miniature version of the design. (And that would be putting it lightly!)

In this closeup, you can see my dilemma. At the smaller size, the design elements are simply too close together. There is not enough space for me to work with my normal range of threads.
Now I could, of course, invest in smaller threads. But you know what? That would make me crazy. I don’t like working with smaller threads. I purposely work with size 8 and size 5 pearl cottons because I can see them without a magnifying glass!
Needless to say, this piece is still unfinished. And it will remain that way! I gave myself Permission to Stop, and I put the idea of smaller projects on the back burner and continued working on large projects until a month or so ago.
A Pint-Size Project that works

When I was working on designs for the Paint•Stitch•Bead program, I took off down a design “rabbit-hole” one afternoon and wound up with a design that just might work as a pint-sized project.
I painted this piece along with the class samples and decided to see how this would work.

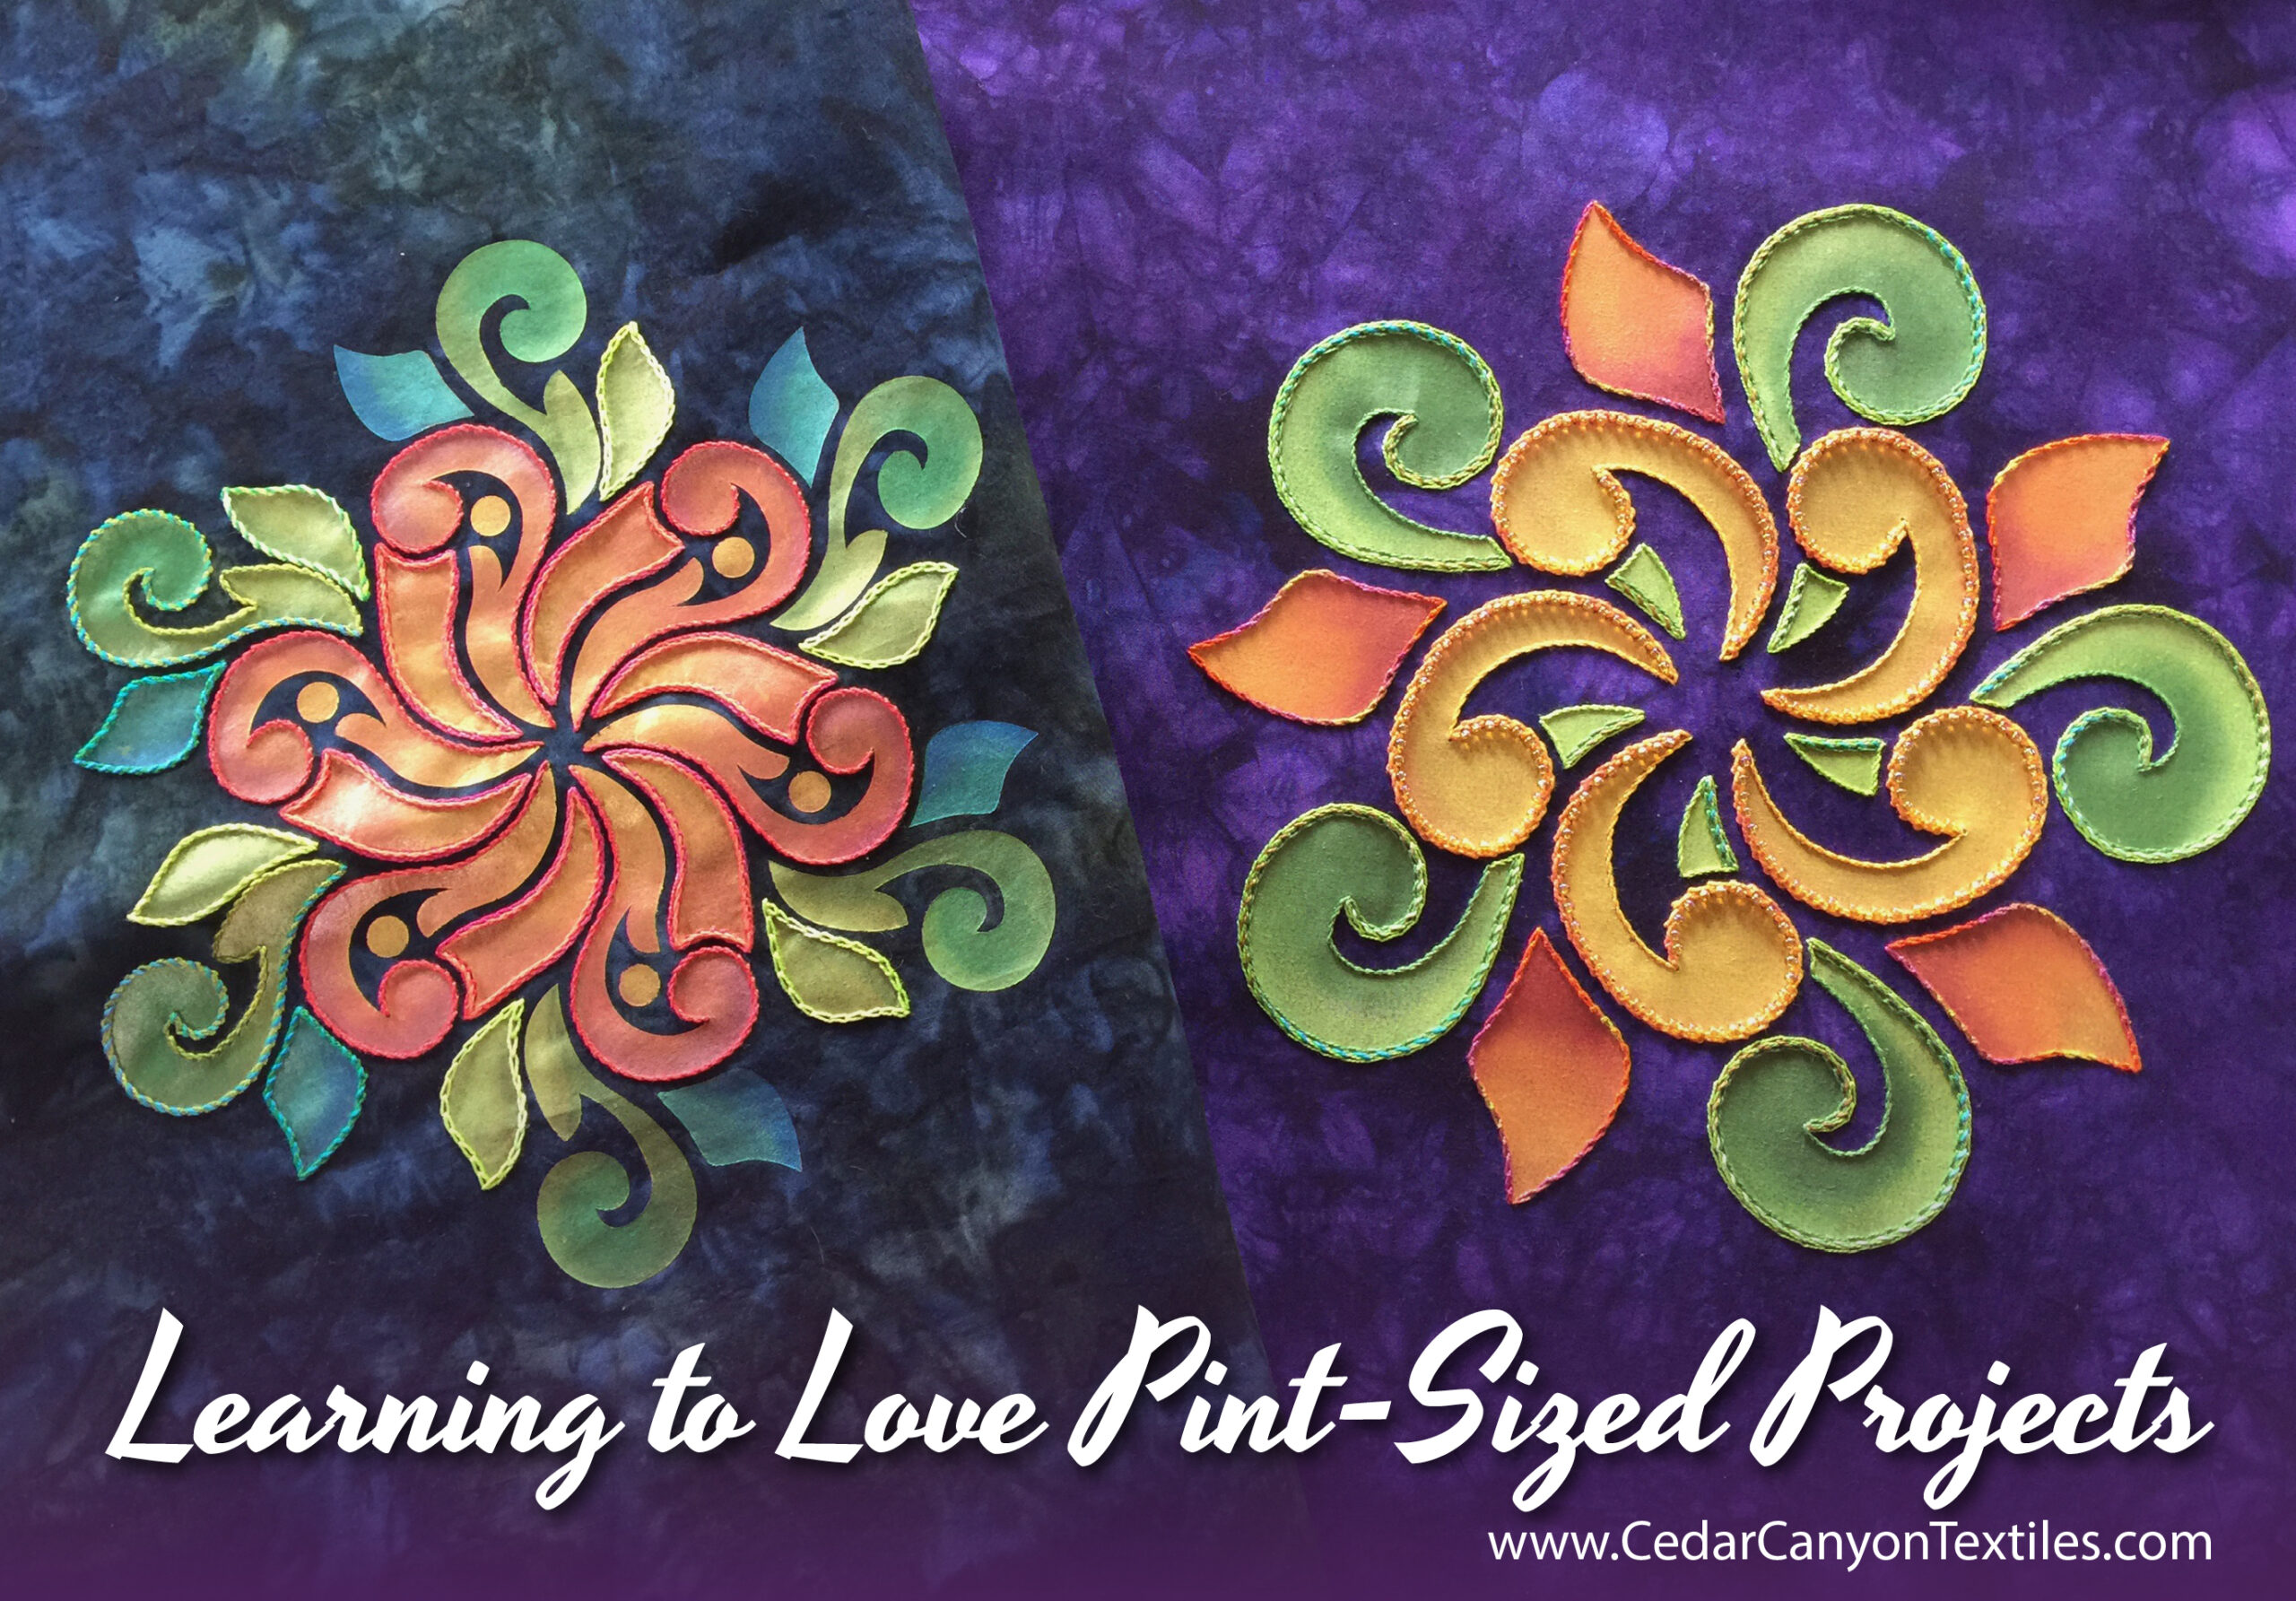
When I removed the stencil, I knew this had great potential. The design is only 10” across, but there are fewer design elements and they are spaced far enough apart for easy stitching.

But here’s the best part… I finished the stitching in just one week. Woohoo! That’s not quite instant gratification — but it’s pretty darn closed when you’re accustomed to projects that go on for months and months! The beading on the center flower was easily finished in one sitting. Such fun!
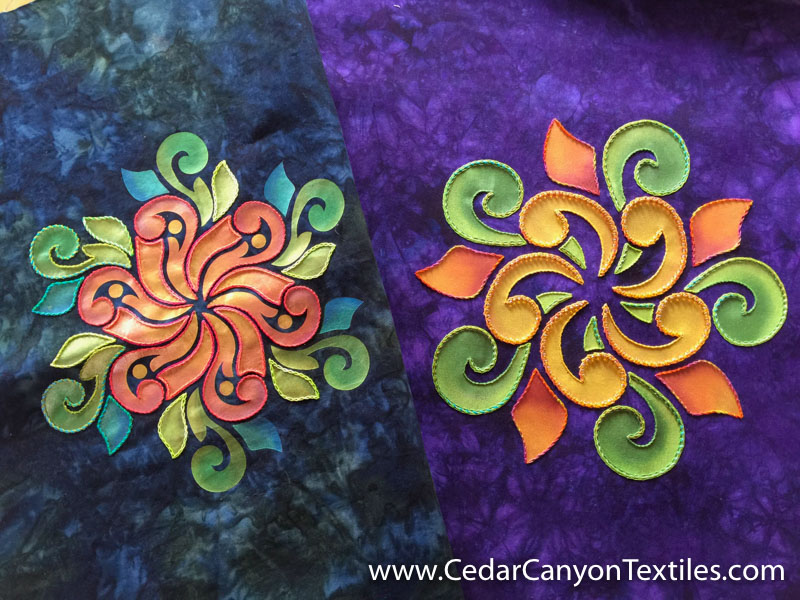
To cement this in my mind, I took this side-by-side photo. Two projects, almost identical in size. Two totally different experiences. Now that I found the “secret sauce,” I can definitely learn to love pint-size projects.
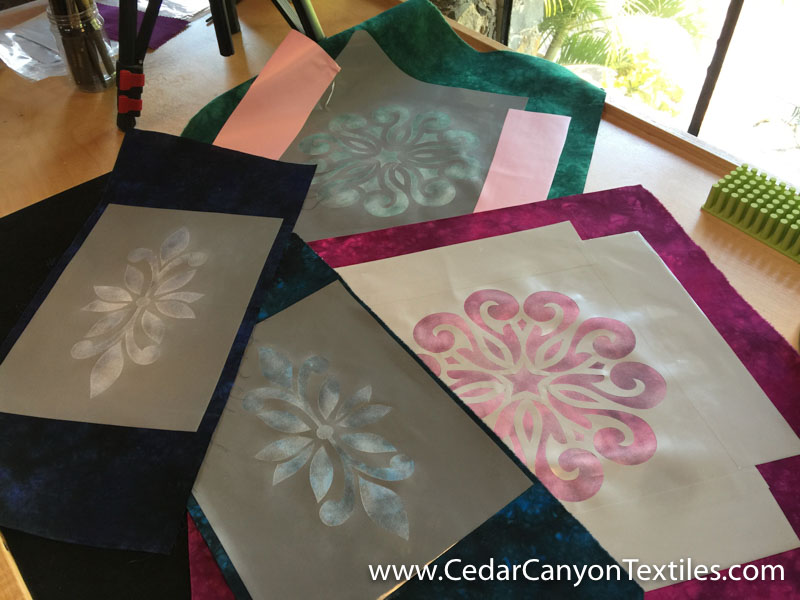
In fact, I was so excited after the first project, I dedicated a weekend to painting up a few pieces to have on hand. I’m not ready to start another large stitched painting, but I feel lost when I don’t have anything handy to stitch on.
On the first day, I made stencils and painted the base layer of Titanium White.
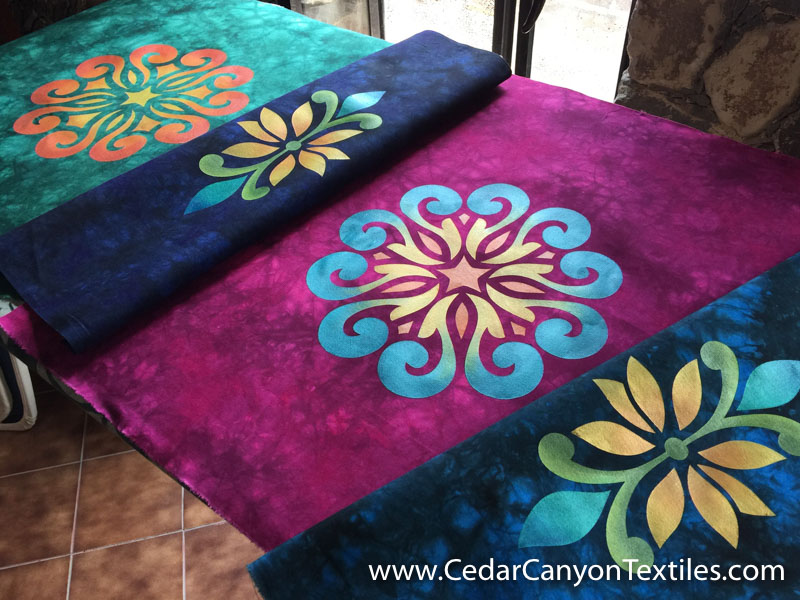
And the following day, I had lots of fun playing with paint.
I will continue to make my large Stitched Paintings. There is no way for a smaller piece to have the same impact — or have the same level of detail. But for now, I’m tickled that I’ve found a strategy for smaller, faster projects. A quick completion here and there is such a treat!
Thanks for reading
Thanks for reading. Your attention is the greatest gift you can give to a writer. I appreciate the invitation to be a small part of your creative world and hope you enjoy this little story.
If you’d like to join the conversation, leave a comment below.
I love your designs but wonder how I can achieve the same results since I’m not creative enough to make my own beautiful stencils. I love working with both fabric and beads though and have wanted to create a wall hanging, preferably small like yours, incorporating beads, thread work, and batiks fabrics.
That’s an interesting point, Maxine. I happen to like (and work at) all 4 stages of my stitched paintings. The design work feeds my Engineer Brain, and the rest of it feeds my Art Brain.
There’s nothing wrong with concentrating your efforts on the parts of the process you most enjoy. In fact, I encourage my students to do exactly that. The big reward comes from finding things that make us happy and doing more of those things. If design is not your “thing,” let someone else do that part for you!
Besides a wall hanging, what else might we do with a small project?
I guess that depends on what makes you happy, Nancy. Small pieces can be part of a pillow, the side of a purse or tote bag, the cover of a book/journal, an accent on a garment. One just never knows!
What are you using to print & cut these stencils? Do you use the computer to design then transfer that image to your cutting machine? By the way I love what you do & I have several of your paint sticks & precut stencils. Keep up the great work!!
Yes, Mary Ann. I have been working with a Silhouette cutting machine for 5 or 6 years now. I draw the images in the Silhouette Studio software, then cut the stencils from sticky-backed vinyl. The options for stenciling are much, much greater when you can cut your own stencils instead of being limited by what you can purchase. Plus, you can re-size designs quickly and easily.