
Journal
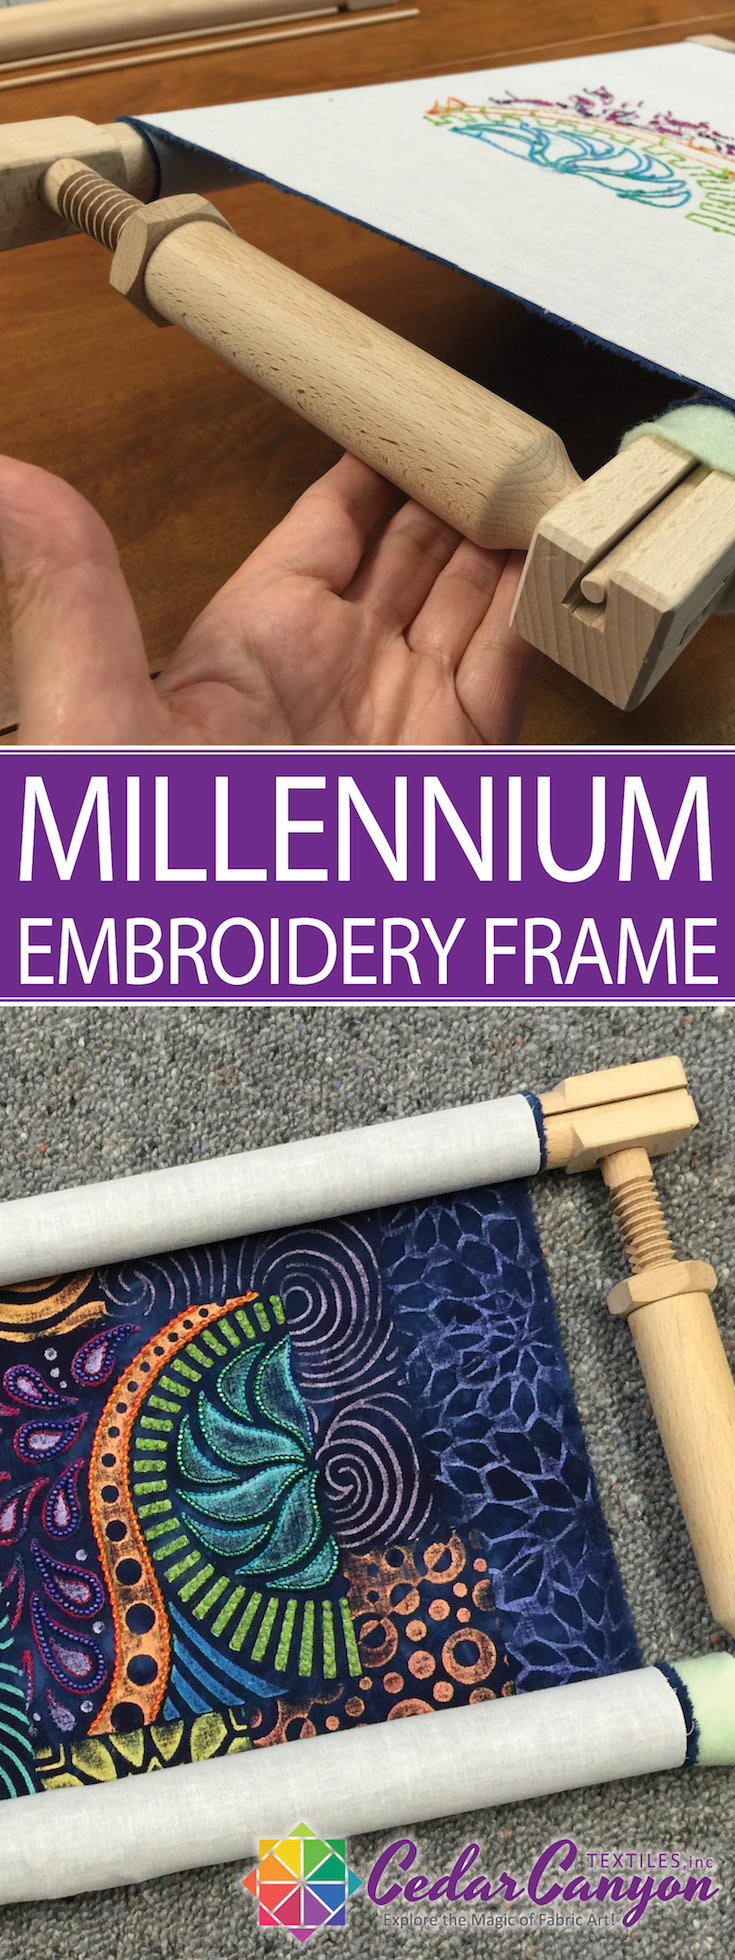
Millennium Embroidery Frame Review

I have posted a few photos showing my current embroidery project in a frame, and many of you have asked about it. Now that I’ve had a chance to take a series of pictures, I’ll tell you about my Millennium Embroidery Frame.
[Tweet “Beautiful AND functional makes for a great embroidery frame.”]
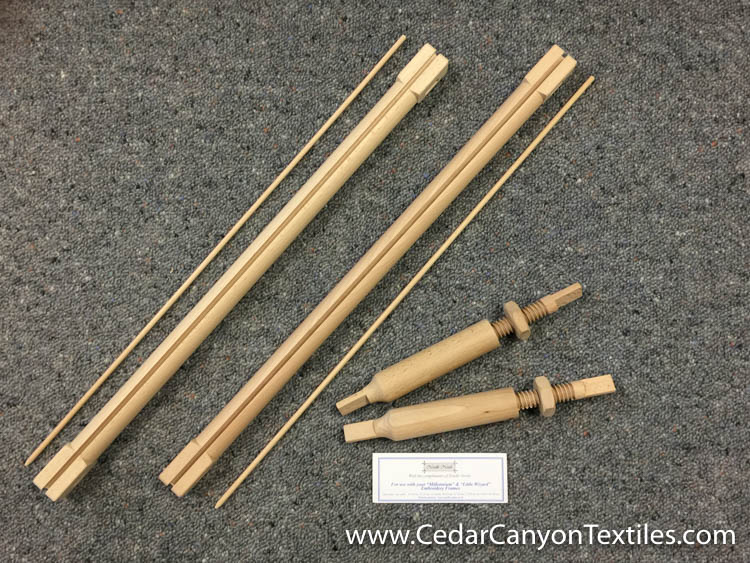
Millennium Embroidery Frame parts
The frame is made by Needle Needs, a company in the UK. A complete frame consists of a top and bottom bar, a couple of dowels and two side stretcher bars.

Millennium Embroidery Frame side stretcher bars
The entire frame is made from beautifully turned hardwood. The side stretchers are a work of art in themselves.

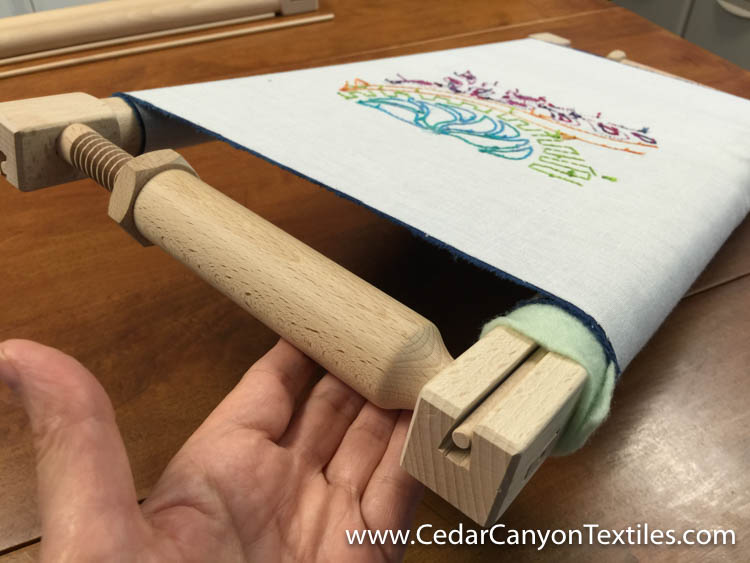
Press fabric into slot with stiff card
To set up the frame, you place one end of your fabric over the top or bottom bar, and use something stiff to tuck the fabric down into that slot.
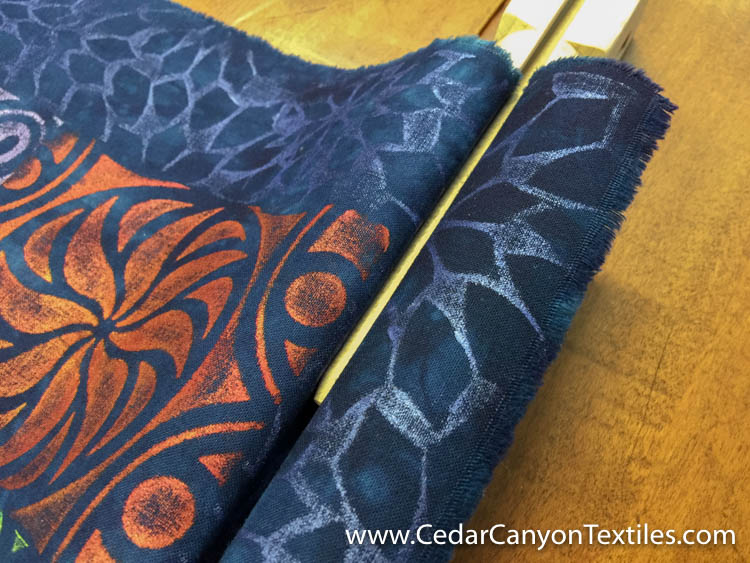
Slide dowels in from the end
Then slide the dowel in from one end of the bar, making sure you can see it on top of the fabric.
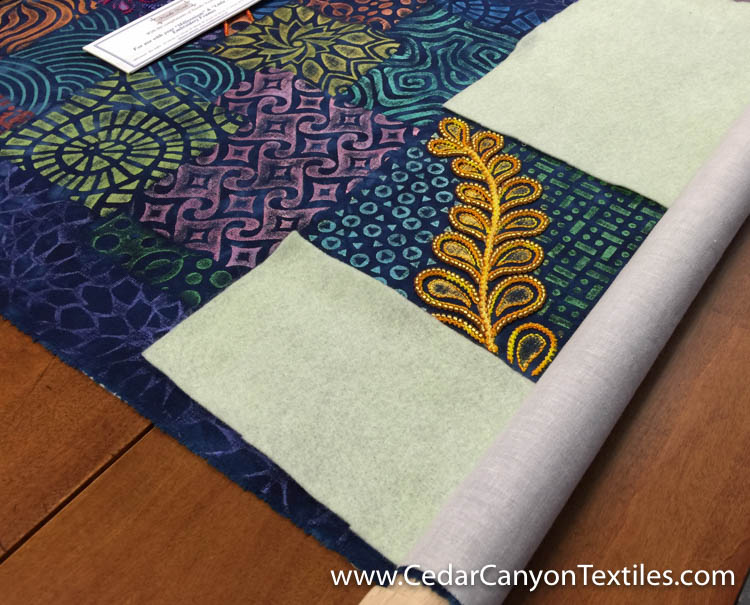
Add batting to protect beads if necessary
I’m working with beads as well as embroidery on this project. In order to keep the fabric tension even (and to avoid crushing the beads), I add a piece of batting on either side of the beaded section. It’s not a perfect solution, but it’s working just fine for me.

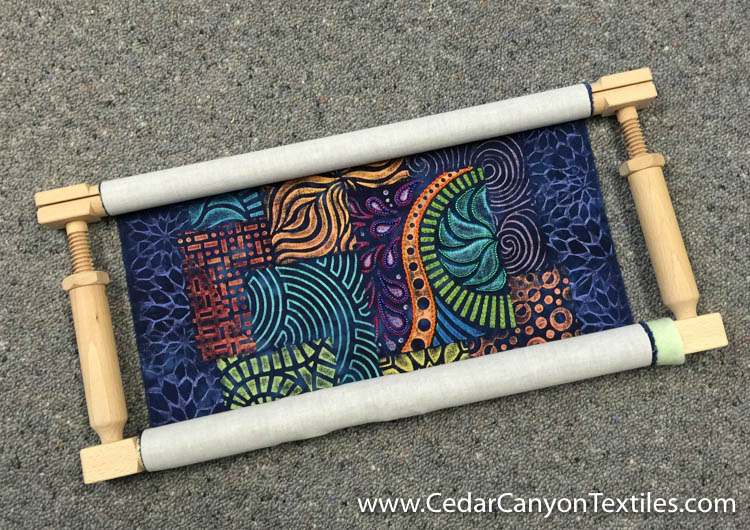
Roll ends of project toward each other
You can roll the project in either direction. I roll it so the backing is rolled to the top. This keeps my arms off the front of the project as I stitch. (The white you see is a piece of lightweight fusible interfacing fused to the back of my fabric.)
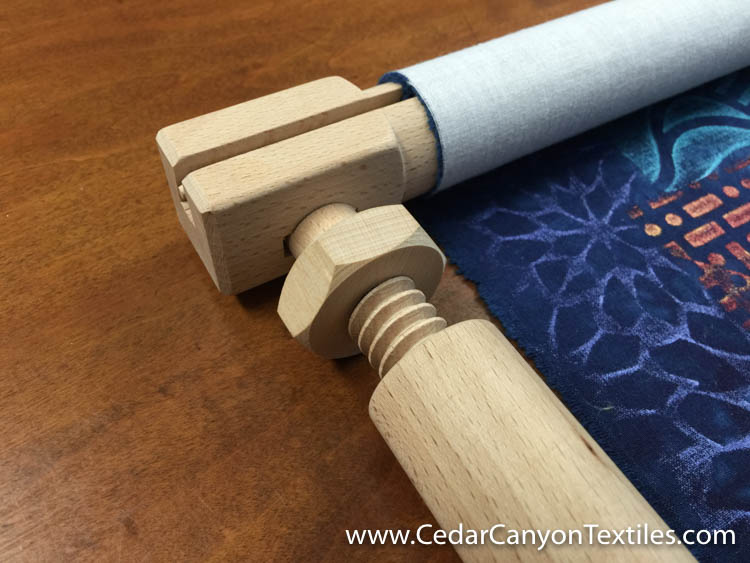
Insert side bars into both top and bottom bars
Once the sides are rolled up, I insert the top of the stretcher bars into the top bar and use the wooden nuts to tighten the fabric on the frame.
Use the wooden nuts to tighten the fabric in the frame
Once the fabric is stretched tight, I’m ready to stitch! When I finish for the day, I loosen the nuts a few turns to take the tension off the fabric.
Ready to stitch!
The Millennium Embroidery Frame works for me for several reasons.
- I don’t have to lace the fabric up the sides of the frame, and this allows me to work on long projects quite easily.
- The frame breaks down for travel quite easily.
- The bars come in a lot of different sizes (up to 36” wide), and that allows me to work on large panels of fabric.
I recently ordered a second frame so I can have several projects set up at any given time.
The Millennium Embroidery Frames are not inexpensive, but the quality is quite amazing. A frame with the 10” – 12” side stretcher bars and 24” top and bottom bars runs about $72 USD at today’s exchange rates. Shipping from the UK will run another $44.
Another thing to know is that you must be PATIENT. These are not cookie cutter frames turned out on a massive assembly line somewhere in a third world country. The company does their best to deliver orders in 8 – 12 weeks. I placed my first order at the beginning of December last year and it did not arrive until mid-March. So… don’t be thinking this will work like Amazon Prime.
UPDATE (Nov. 2017) After several readers sent messages telling me that they have waited deplorably long times and still don’t have the frames they ordered, I can no longer give this company a thumbs-up. I have no idea what the problems are as they do not respond to email inquiries. Order at your own risk.
[Tweet “A frame is especially helpful for adding beads to hand embroidery.”]
You Will Need A Stand

You will need a lap stand or floor stand to use this frame
Unlike many hoops, you will need some type of stand to use a Millennium Embroidery Frame. They are simply too heavy to hold in your hands. I’ll tell you more about the stand I chose in a future post.
A Different Stitching Experience
Until I found the Millennium Embroidery Frame, I refused to use any type of frame for stitching. Hoops left marks in my painted fabric, and I simply found them cumbersome.
Because I can get a project into the Millennium Embroidery Frame quickly and easily – I have come to enjoy stitching with a frame. I find it especially helpful as I am adding beads to my fabric. (Having both hands free is really nice!)
It’s very different than holding the fabric in my hands. I don’t use the frame for everything, but I expect to have a long and happy relationship with these frames.
Resources
Here are some links to more information about the Millennium Embroidery Frame. (These are not affiliate links. I’m reviewing this product because I like it and use it.)
- Needle Needs
- Millennium Embroidery Frame
- Video Tutorials (Watch the two at the bottom of this page)
Your Turn
Do you have a favorite embroidery frame or hoop? What do you like or dislike about it? Leave a comment below. I love to hear what’s on your mind.
This is really interesting. Thank you for the information and demonstration about this frame. My favorite frame for embroidery is a tiny 4″ hand held wooden circular hoop with a brass set screw. I work within the circle…rest, move to another spot. “Sew, rest, move.” That rhythm works for me and is light weight and helps me to not overdo the same hand movements. Plus it is portable and easily carried about.
I can definitely see the draw for a small hoop, Susan. In terms of weight and portability, it is certainly the way to go.
Using a large frame like the Millennium is not for everyone — or every project. It’s lovely that we have so many options available.
Shelly,
I’m having trouble finding a floor stand like you have. I’m using a scroll frame and I do have a floor stand that holds the frame and does have a lot of adjustments to move the work around but I think having the frame just sitting on the stand would make it so much easier to flip over to knot and also to rotate as you work around a motif. I’m stitching a zen tangle-ish drawing I did on fabric so it has a LOT of small shapes.
I’m sorry, I’m not good at waiting…
Not a problem, Deb. The floor stand is called Just a Thought. I looked up the site and it is http://www.justathought.net/bl/
I see that she has also designed a lap stand that I might just have to order. And she has a new stretcher system. Lots to check into.