
Journal
Knotty Stop Beads

This Paint + Stitch + Bead thing is just too much fun! Even though I’m knee-deep in lessons for the next class, I try to sneak in a bit of stitching time every day. So… back at the embroidery frame…
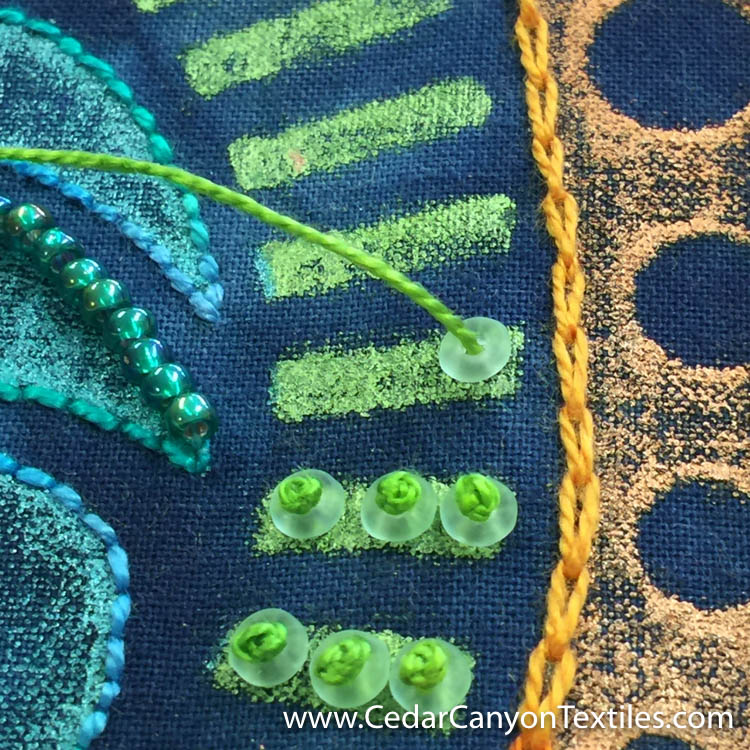
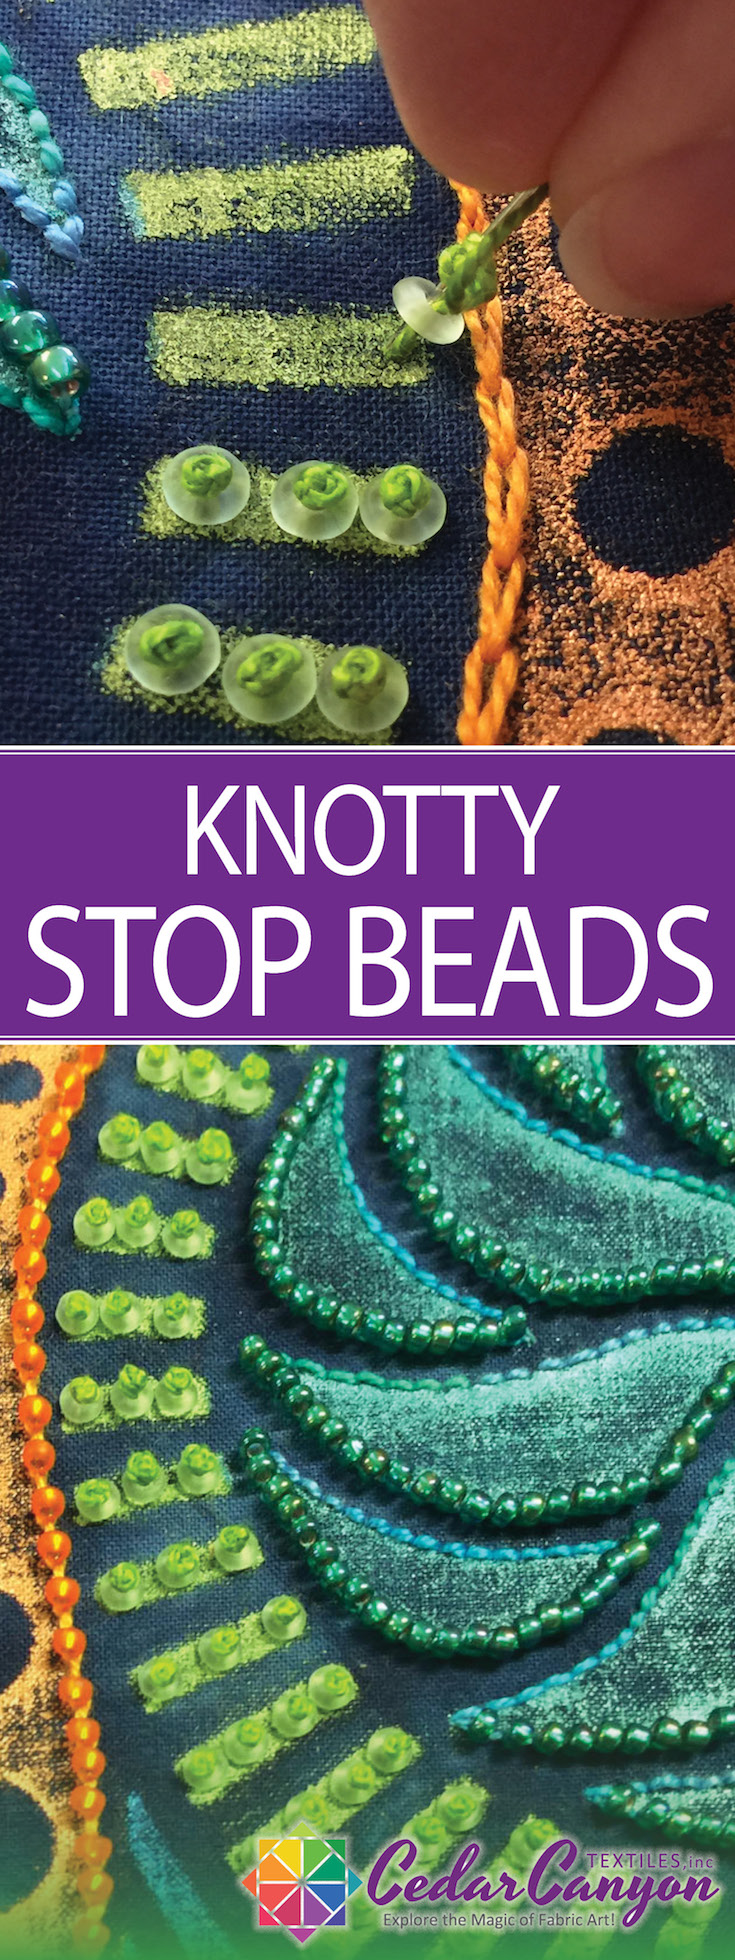
I debated several options for stitching the linear shapes in this section of the design, and settled on O-Beads. My initial thought was to use a lime green stop bead, but after a few experiments, I decided French Knots would be more fun. Knotty Stop Beads? Why Knot?
[Tweet “French knots make perfect stops for o-beads. Give it a try!”]
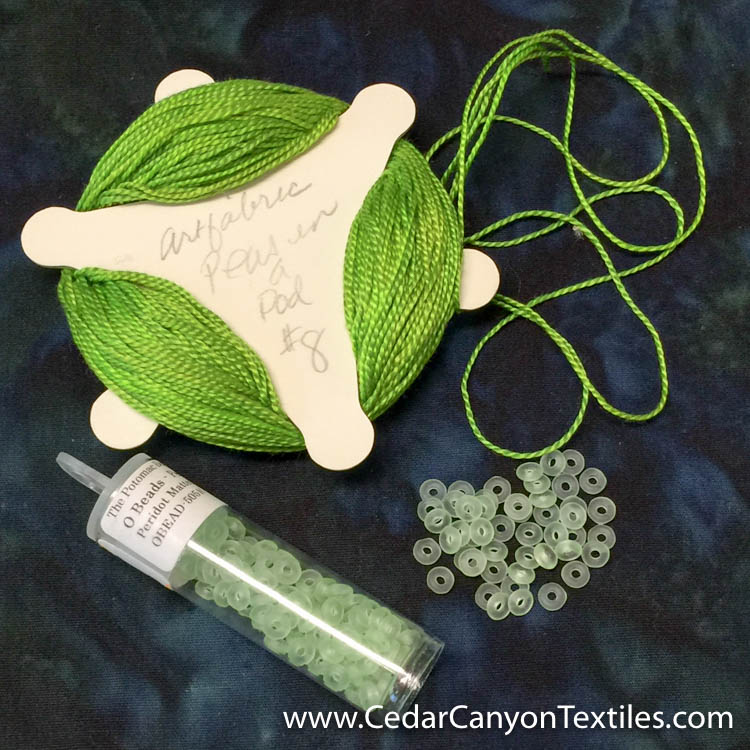
Peas in a Pod thread from Artfabric.com and O-Beads
After digging through my embroidery threads, I chose the Peas in a Pod size 8 pearl cotton from Artfabric.com, frosted O-Beads from the local bead shop and a milliner’s needle small enough to fit through the O-Beads. Here is the stitching sequence:
Knotty Stop Bead Stitch Sequence
1: Bring thread up through O Bead
First, bring the thread up from the back of the fabric, and add an O Bead.

2: Wrap thread around the needle three times.
Next, wrap the thread around the needle several times. Three wraps with size 8 pearl cotton worked well for me. The knot was about the same size as using a size 8 seed bead to hold the O beads in place.

3. Insert the needle through the O Bead and into the fabric.
With the thread wrapped around the needle, go back down through the O-bead and into the fabric. Do not pull the needle through just yet.
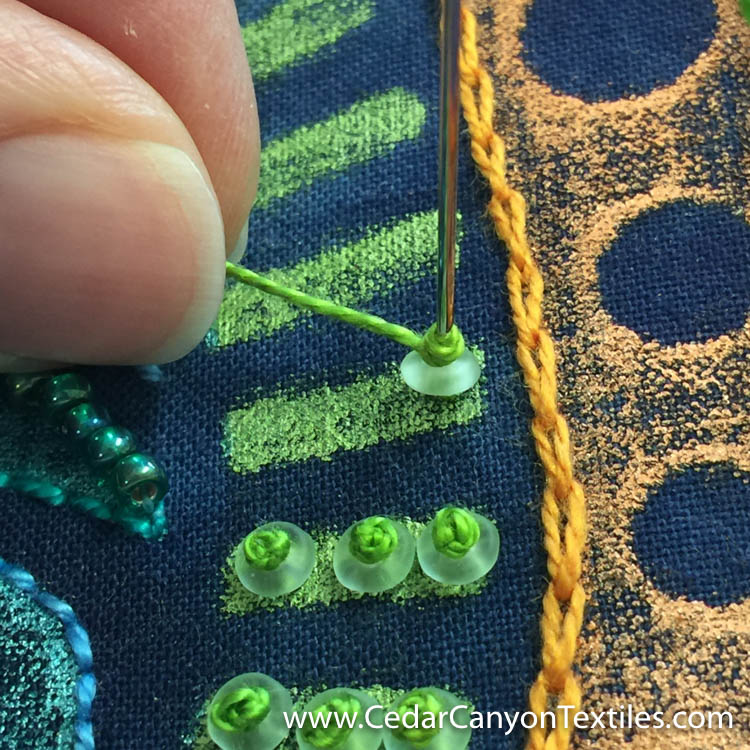
4. Tighten the thread around the needle.
Pull the thread so the three wraps are snug against the needle. (Just not so tight that you can’t pull that needle through!)

5. Pull the needle through to finish the knot.
Then pull the needle through the fabric to finish the knot.

Knotty Stop Knots all lined up!
I love the way these Knotty Stop Beads look on my project! They look like a bunch of little people lined up and marching in a parade.
[Tweet “Jazz up your hand embroidery with O-beads and Knotty Stops.”]
To Frame, Or Not To Frame…
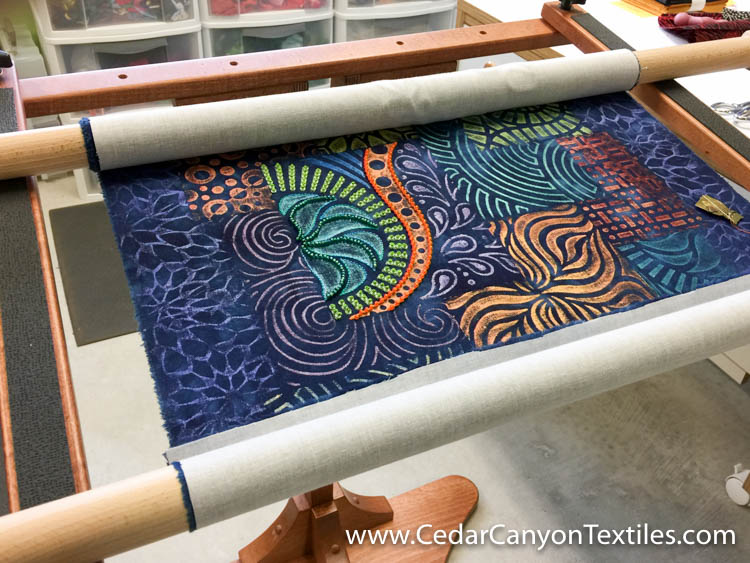
Working on an embroidery frame
Until recently, I did all of my hand embroidery without using a hoop or frame. I ordered a frame and a floor stand a few months back and am finding it very helpful. It’s a totally different stitching experience, but it’s becoming more and more a part of my routine.
I find it especially helpful to have both hands free for knotted stitches like the one I described today. I’ll locate the information on the frame and stand and tell you about those in another post.
Your Turn
Are you a fan of Knotty stitches? Do tell! I’d love to hear all about your Knotty secrets!
I have done a lot of beading, but never French knots on top of beads. We learn something wonderful every day. Thank you for sharing.
Theresa Kaveney
You’re welcome, Theresa. I have done very little beading, and am only a few years into my embroidery adventure. I credit my lack of experience and learning for some of my off-beat ideas about combining the two. ?
I too , have not done very much beading or hand embroidery. I think it’s neat that you’ve combined the two into a very doable plan. Sometimes we do things , when we don’t know what to do, that might seem way out of the box for those in the know. But that’s how we come up with new ideas.
I learned some new ways to sew on a button, when I watched an episode of The Quilt Show, a while back. Who knew that a button could be such a decorative treatment?
Great thoughts, Marlyn. Some of our best ideas come from just doing — and not so much thinking. I love that you picked up on the “new way to sew on a button” bit on the Quilt Show. If we keep our eyes (and our mind) open, new ways of doing things are just waiting for us to notice.
Great idea..I’ve been doing the sequin/seed bead thing for many years and haven’t ever heard the “stop bead” term. Yep, we do learn new things every day. You might also try a colonial knot..they are easier.
Will you bead the whole piece? I’m loving it.
Very interesting Linda. I assumed that the term “stop bead” was widely used in beading circles. I guess we should never “assume” anything! I remember doing Colonial knots in a class. I’ll have to look them up again.
My initial plan was to only add beads to a couple of sections of this piece, but I might have to bead the whole thing. The sections are meant to appear “layered” one on top of the next, so I’ll have to go to smaller and matte finish beads to achieve the effect I want. I definitely have not thought that far ahead.
Shelly, I don’t seem to be able to find where I sign up to follow your blog. I get your newsletter and have switched over to the blog from that but I’m finding I LOVE your much more detained articles from the blog. The pictures are fantastic. This beading ‘thing’ is really great.
Thanks, Terry
Thanks for the ping on the Blog sign ups, Terry. I sent a request over to my web team. We should have an RSS feed (or whatever they call that!) shortly.
I’m glad you like the new blog format. The new site lends itself nicely to bigger photos. I wasn’t sure if they would be too much when I started, but I like the bigger pics.
Thank you Shelly for sharing.
You’re most welcome, Wendy. Always nice to hear from you.