Journal
Hawaiian Quilts In A Hurry!
Last week, we talked about paintstik appliqué – and how it’s a whole lot faster to add images to fabric with paintstik color than with traditional appliqué. Today, I want to go one step further and talk about “extreme appliqué.” In case you’re wondering, I’m talking about those magnificent two-color Hawaiian quilts.
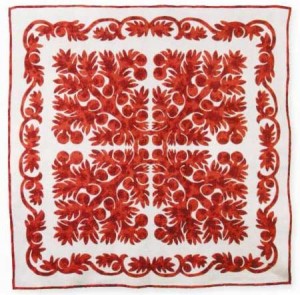 Think about it… is there anything more extreme in terms of handwork? Have I mentioned that I’m allergic to needle and thread???
As I said last week, I can paint a whole lot faster than I can appliqué — and that goes double for something like a Hawaiian quilt. I will never tackle anything like this red and white quilt by Yoko Niizawa — not in my lifetime! (This quilt is documented in the book The Hawaiian Quilt: The Tradition Continues).
But a few years back, I did create a Hawaiian style quilt. I ran across photos of the quilt while I was digging through my files, and I thought I would share them today.
Shelly’s Water Lily Quilt Adventure
I started by folding a piece of freezer paper into a wedge, and drawing my design. I stapled through all the layers in the “design” portion of the paper and cut around the design with a sharp pair of scissors. (Google “how to make a 4 sided snowflake” for folding & cutting instructions.)
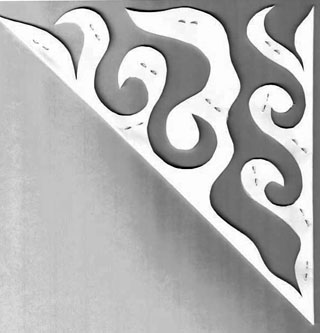
When I was finished, I unfolded the “not design” portion of the freezer paper and pressed it onto my fabric with a warm iron.
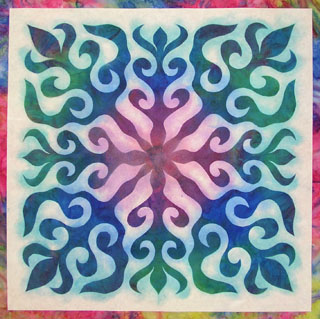
With the freezer paper stuck on the fabric, I use 5 iridescent paintstik colors to color in the design. (I used iridescent pink, purple, blue, turquoise and green.)
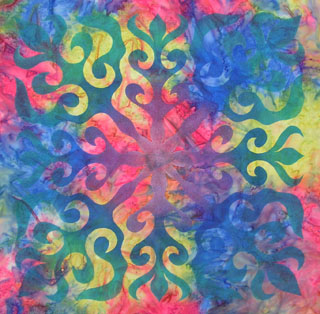
When I removed the stencil, I had a painted image. Unfortunately, it blended in with the fabric a little too well.
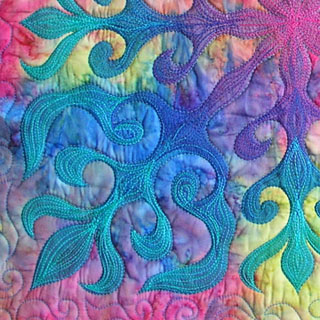
I didn’t have any choice about the background fabric (I was working with a challenge fabric), so I added stabilizer to the back of the fabric and added a lot of free-motion embroidery.
After removing the stabilizer, I layered the quilt, said a prayer, and stitched carefully around the entire design. (The prayer was to ask for the top to flatten out as I stitched — and it did!)
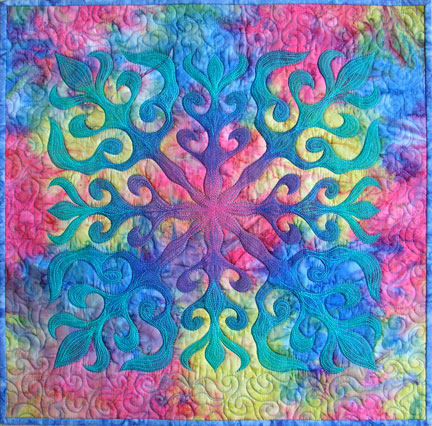
To finish the quilt, I added some swirly quilting around the border, blocked the quilt to remove the last of the ripples, added a binding, and celebrated a sweet success. My 20″ Hawaiian-style quilt took less than 12 hours, start to finish!
Now you may be a whole lot more talented than I am with a needle and thread, but I’m sure it would have taken me at least 10 times longer to make this quilt the traditional way. If you love appliqué, have at it — but if you share my “allergy” to needle and thread, just know that there is a much simpler way to create these beautiful quilts!
Meet Mary Corcoran — An Artful Explorer
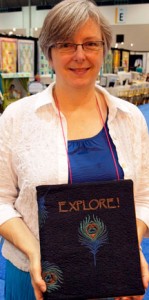 My favorite part of attending Quilt Market is meeting bunches of wonderful people. On the people front, my trip to Kansas City was more than successful!
One of my visitors was Mary Corcoran, one of the talented designers at Anything But Boring. (Mary teams up with my buddy Janice Pope to create some pretty cool bag and quilt patterns. Click over to their site to check it out!)
Mary brought one of her beautiful painted journal covers — all done with paintstik colors and stencils. I just love seeing what you do with our paints, and I was thrilled to see Mary at market.
Mary’s journal cover is covered with really beautiful peacock feathers — painted feathers, of course! All of the images, including the text, were stenciled on fabric with iridescent colors. It’s really a beautiful piece. Here’s a closer look:
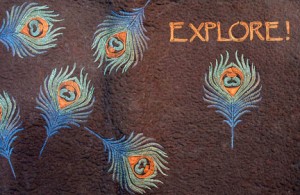
I also love Mary’s choice a title for her journal. I’m rather partial to the word “Explore” — it’s the perfect sentiment for a community where we Explore the Magic of Fabric Art. How’s that for a happy coincidence?

I LOVE it! Can’t wait to try it myself!
That’s great, Melissa. Be sure to send a picture of your project — or post on our Facebook page.
I tried this. It was so easy!
Good for you Barbara! If you’ve got a picture, I’d love to see it. You can send it by e-mail to contact@cedarcanyontextiles.com