
Journal
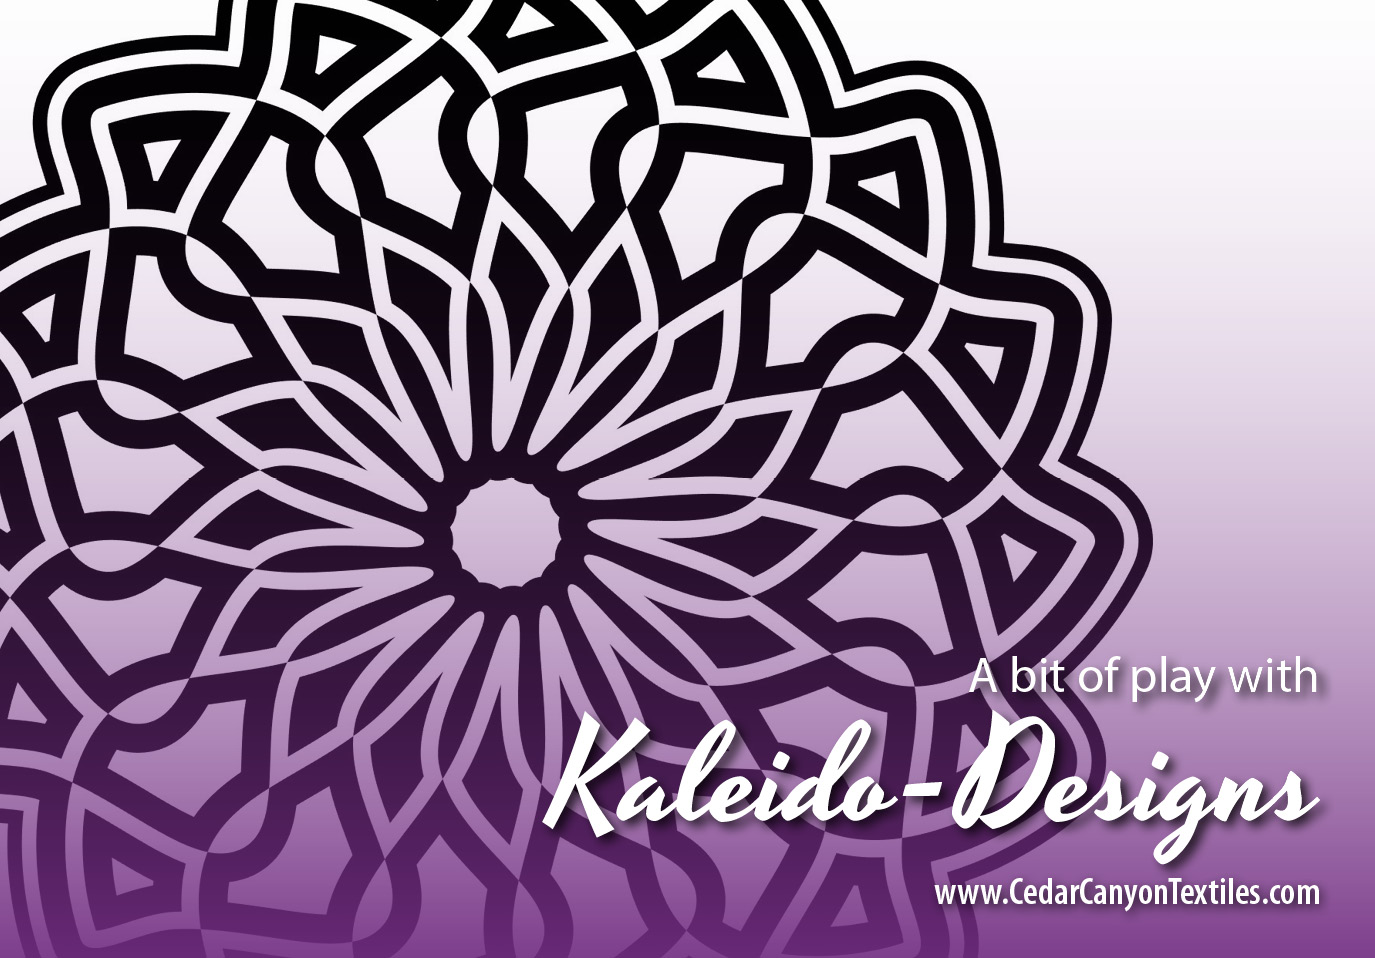
A Bit of Play with Kaleido-Designs

There’s nothing like teaching to set a person’s mind to learning something properly. With my classes at the All Things Silhouette conference coming up, I’ve been doing a lot of playing with a concept I call Kaleido-Designs.
I’m having tons of fun with this. When I designed the Kaleidoscope Rubbing Plates, I did the doodles and my graphic artist turned them into designs that worked. Now, with Silhouette Studio in my toolbox, I can make the designs myself!
This post is going to be a little on the techie side, but if you’re curious about how folks create those cool designs you like so much, read on!
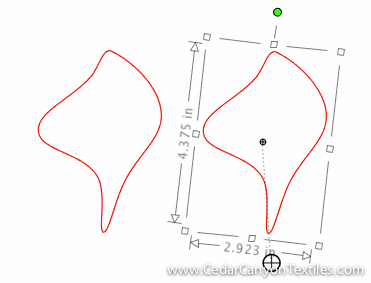
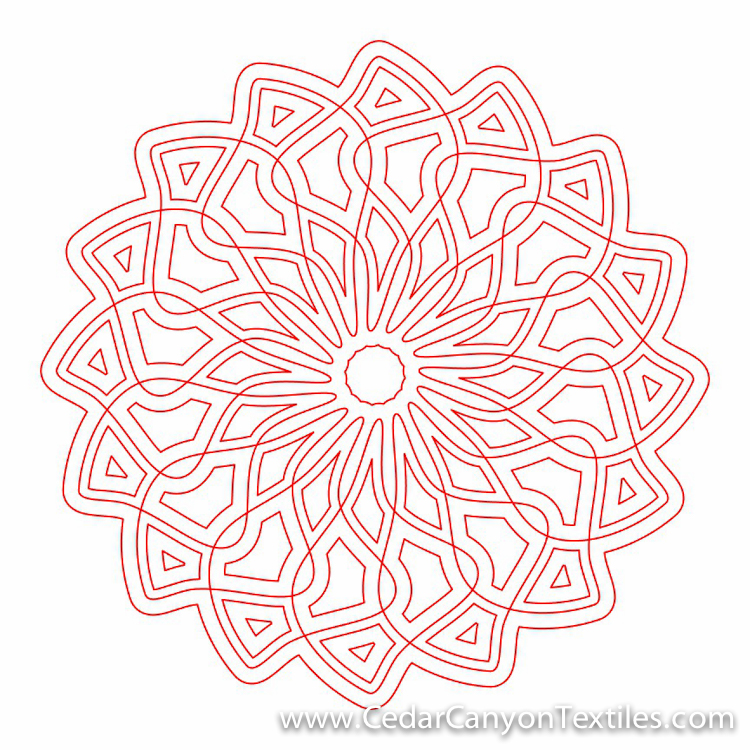
Pull the Center of Rotation to a new location
The key to the lock for making Kaleido-Designs is a little thing called the Center of Rotation. When you draw a shape, the center of rotation is in, well, the center of the shape! But… you can pull the center of rotation to a new location inside or outside the shape and use that to your advantage. (That black circle with the crossed lines in the middle is the Center of Rotation.)
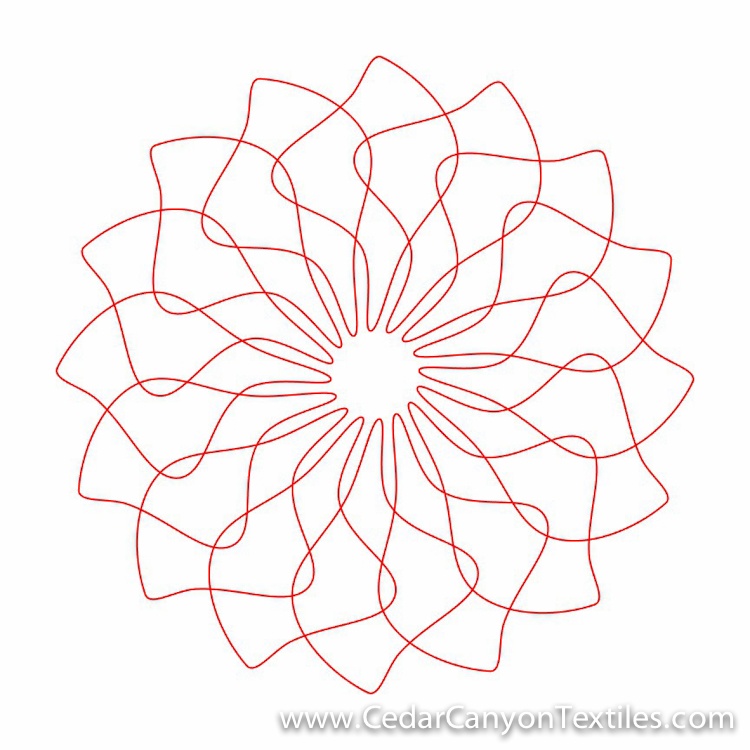
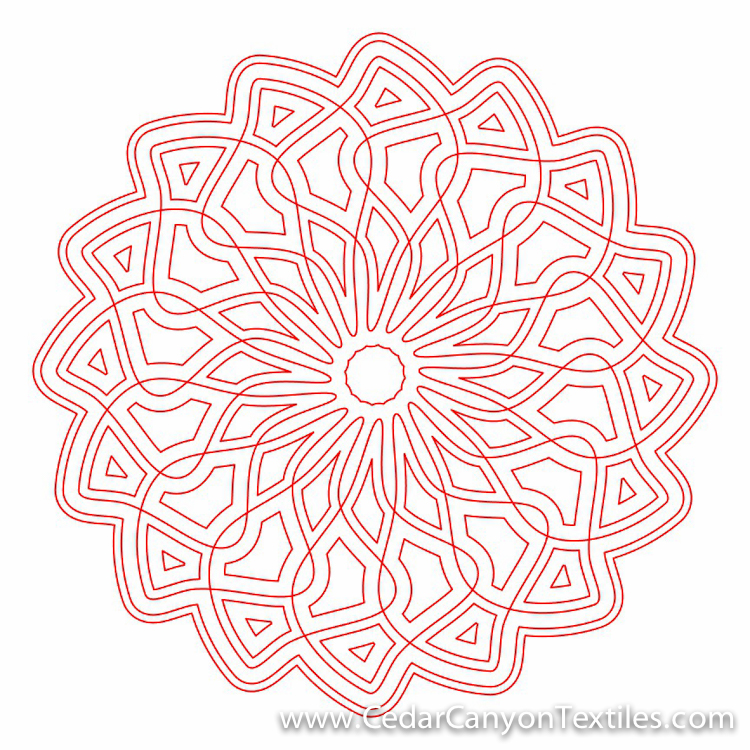
Use the tools in the Replicate panel to create a circular pattern
The next step is to use the tools in the Replicate panel to create a circular pattern. You can evenly rotate as many copies of the shape as you want with just a tiny bit of math. In this case, I rotated 15 copies (for a total of 16) by 22.5 degrees. (That’s 360 degrees divided by 16.)
Oh, I know… you probably don’t like math. But one short calculation is not the end of the world. Hang in there with me!
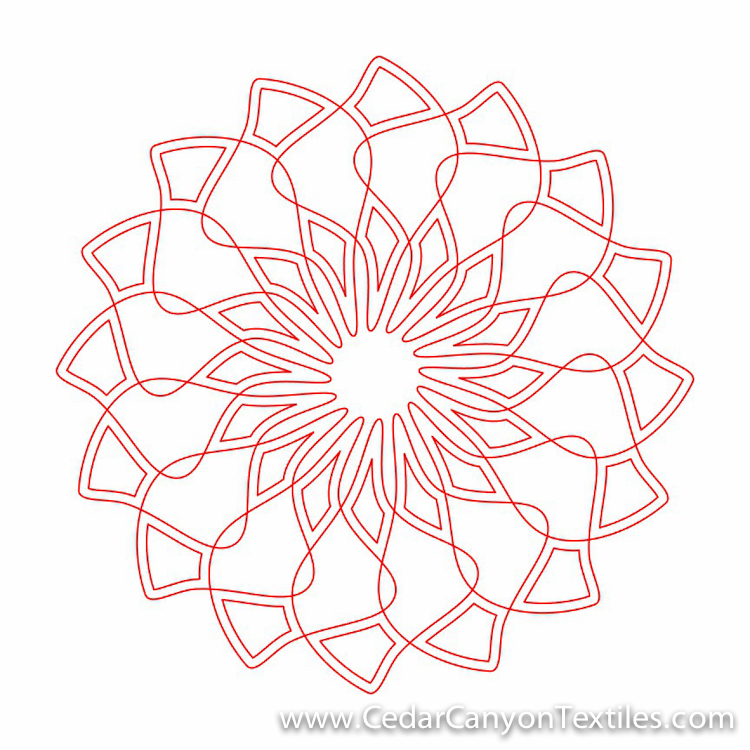
Apply an Internal Offset to create shapes inside the design
Once you have a circular pattern, it’s time to play with Offsets and Compound Paths. In the photo above, I applied an Internal Offset to add new shapes inside the original shapes. Then I selected the whole batch of shapes and turned them into a Compound Path.
This Compound Path thing is a little hard to get my head around. Let’s just say that the software takes all the shapes that are selected and turns them into one coherent shape instead of treating them as a bunch of individual shapes. (I know there is a more elegant way to describe this, but I’m still working on that!)
Apply an External Offset to create additional shapes
At this point, it’s all play. I added an External Offset to create more shapes. Such fun!
Continue working with Offsets until you are happy
This process can go on and on. Sometimes you need to turn everything into a Compound Path and then apply an offset. Sometimes you need to Release the Compound Path and apply the offset to a single shape instead of to everything. It can be tricky to recreate a design without taking very careful notes, but it’s lots of fun!

Add Fill Color and Enjoy!
I love seeing what happens when I add color to a design. When I get to a point that I’m happy with, I turn the whole shootin’ match into a Compound Path and then pick a fill color. Ta da! A fantastic Kaleido-Design!
The cool thing here is that the software adds color to alternating design elements –– perfect for turning designs into Renegade Stencils for painting on fabric!
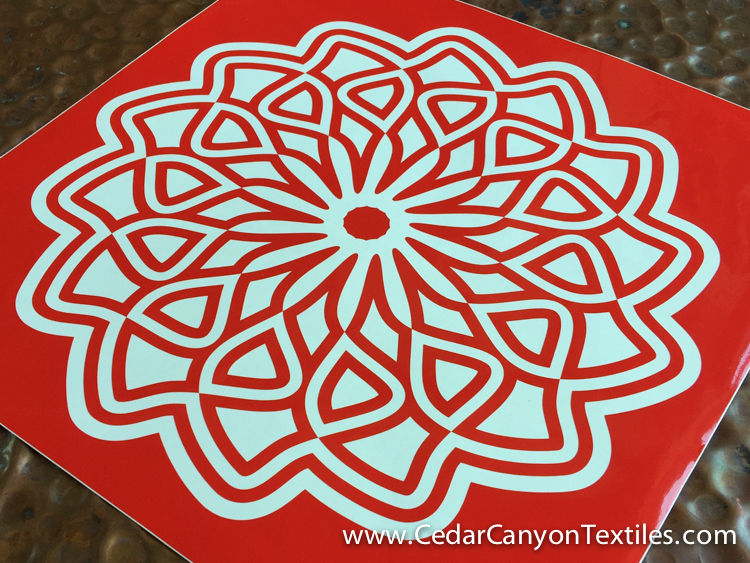
Kaleido-Design cut in vinyl (Renegade Stencil)
This is one of the designs I created during my play day. I cut a Renegade Stencil from adhesive back vinyl and peeled up the extra vinyl (that’s called “weeding”) where I want to add paint. I don’t normally cut stencils from brightly colored vinyl, but I wanted this for a sample in my classroom.
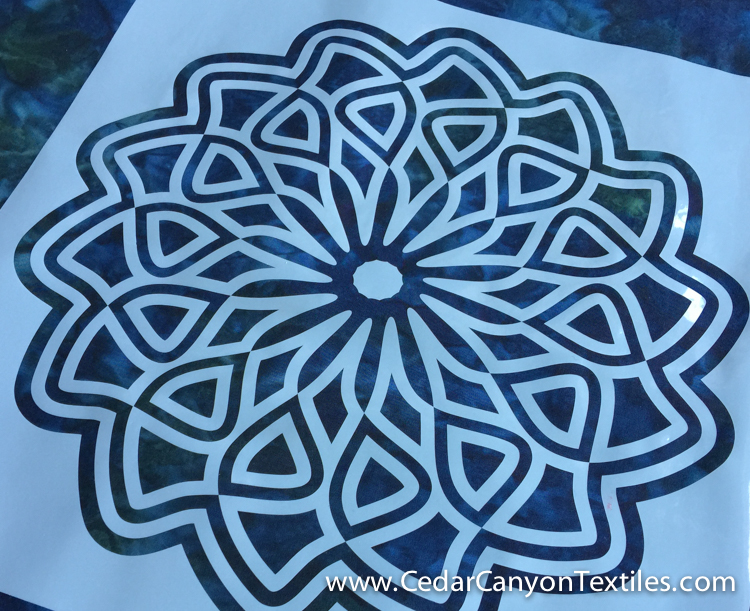
Renegade on fabric –– Ready to paint!
Finally, I cut a second Renegade Stencil from medium gray vinyl. (It’s soooo much easier to use gray for painting!) After weeding the excess vinyl away, I used transfer tape to move the stencil from the backing paper to a piece of batik fabric – and I’m ready to paint.
Your Turn
So, what do you think of this Kaleido-Designs idea? Do you like the idea of creating your own Kaleidoscope-like designs? Leave a comment below. I’d love to hear your thoughts.
Love It! Can’t wait to try it! One question: I understand the part about using the gray vinyl, but am having a mental block about the need for the red one. ?
Hi Sandra, I cut the red vinyl because it will be good for holding up as a sample in a large classroom. For classrooms, high contrast is important. Grey on white is not easy to see from the back of the room!
OH no!!!! more clever stuff from you. I see this in my future after a full length organ recital in a few weeks!
Yeessss, Rebecca! More fun to look forward to when you can come up for air from practicing! 😉
Are you going to do an online course on this? What online courses are are you doing in 2018
Good questions, Rebecca! I’m trying to figure out 2018, but enjoying having a break to get settled in here in Chapala. It has been a hectic year.
I think that Kaleido-Designs should be a topic in the Silhouette Advanced Topics course. 🙂
I love that idea! I’m going to try it with fabric to make a quilt! I like the simplicity of starting with one shape and ending up with something spectacular! And it’s an original work of art! Thanks for the inspiration!
You’re welcome, Leslie. The cool thing is that any old shape will work. Geometric shapes (sharp corners), curvy shapes, you name it. They don’t have to be anything special to start off, but they turn into something really cool!
Hi Shelly; Now I can see how to use the rotate and replicate functions. In class this last summer, I didn’t know (or understand) about the moving the center point and the design elements just rotated almost on top of themselves. Thanks for another awesome tutorial! Joy
Hey Joy, you didn’t miss something in class. I didn’t learn about the center of rotation until I was viewing a CraftCast webinar with Cindy Pope, a metal clay artist. I love how much we can learn from people who do totally different things with the Silhouette machines!
See you at conference! I can’t wait even though my brain will implode from all the ideas, techniques and people.
Fantastic! Be sure to flag me down at the conference. I love the opportunity to meet my online friends!
A NEW challenge! I love it! This will be a great winter project to create kaleido-designs – medallion – style vinyl designs. Taking two of your workshops in early 2017, really helped to
get me through the winter months. They kept me busy from January to the end of April… wonderful!
Currently, I have almost completed a contemporary top – a scrappy mystery quilt with multiple options for working with different pieced geo shapes and layouts – an October workshop with Gyleen X. Fitxgzerald. Also, completing several baby/toddler quilts for great-nieces and a nephew as well as creating quilting projects and running monthly quilting guild workshops.
After Thanksgiving and Christmas, I look forward to designing and making vinyl stencils with my Silhouette Cameo. It will a a test to see how much I remember…..
Hi Rebecca! Best wishes to you and Shelly for the Holidays….
Thanks, Elizabeth. It’s always lovely to hear from you.
I so enjoyed both the Kaleido-Design class and the Artist Paintstick class this weekend!!! A whole new creative world has opened up!! Can’t wait for my Paintsticks to arrive!!
Oh, thank you, Beth! I have totally enjoyed the weekend with my Silhouette friends here in Atlanta. Another travel day tomorrow to get back to Chapala, and then it’s time to break out the Paintstiks. I have several projects queued up and ready to paint!
Hi Shelly!
I enjoyed meeting you in Atlanta at lunch!( I am the Alabama transplant) Although I did not take one of your classes I was going through sched. and was looking at all the classes and came across yours. I heard your Kaleido-Design course was worth the whole weekend from other attendees! I did not know that was you! Keep up the great work! I love what you do !:) So many ideas and so little time! It’s hard deciding where to land on all the artsy/craftsy goodness. All so fun!
Thanks, Denise. It was lovely to meet you too. I’m delighted to hear that my students were happy with the Kaleido-Designs class. It’s great fun to watch the “aha” moments when people understand a new concept and see how they can use them for their art or craft.