
Journal
Beaded Palestrina Knots

The more I play with PSB, the more I like it. (And in case I threw you for a loop, PSB is right here in the Shelly Dictionary. It stands for Paint, Stitch & Bead.) Today, I want to show you a little experiment adding beads to one of my favorite stitches. I call it the Beaded Palestrina Knot.
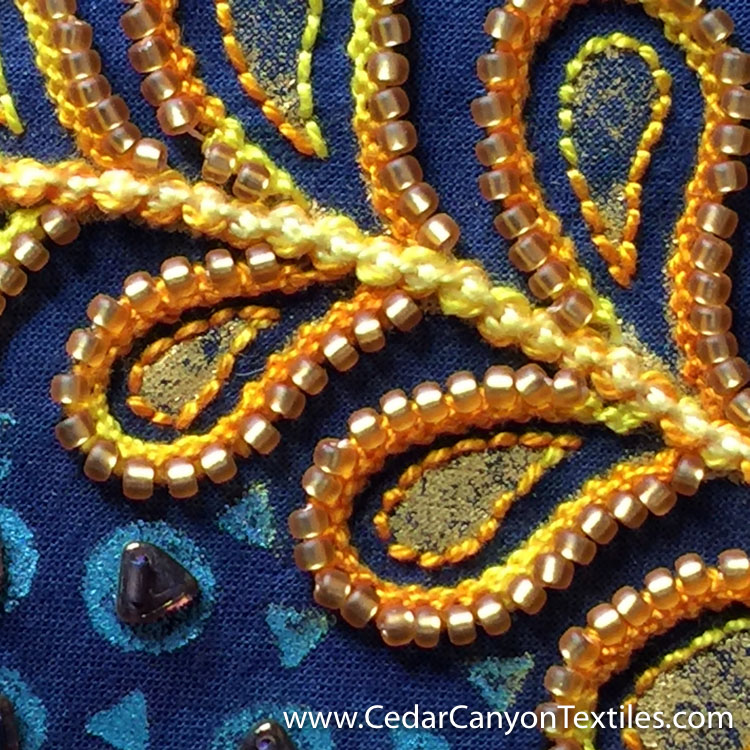
My first attempt at adding beads to Palestrina Knots
The first time I tried adding beads to the Palestrina Knot stitch, the results were a bit wonky. I had worked the knots very close together, and the size 8 seed beads did not fit properly between the knots. But, it got me started down an interesting path, so I’ll call it good.
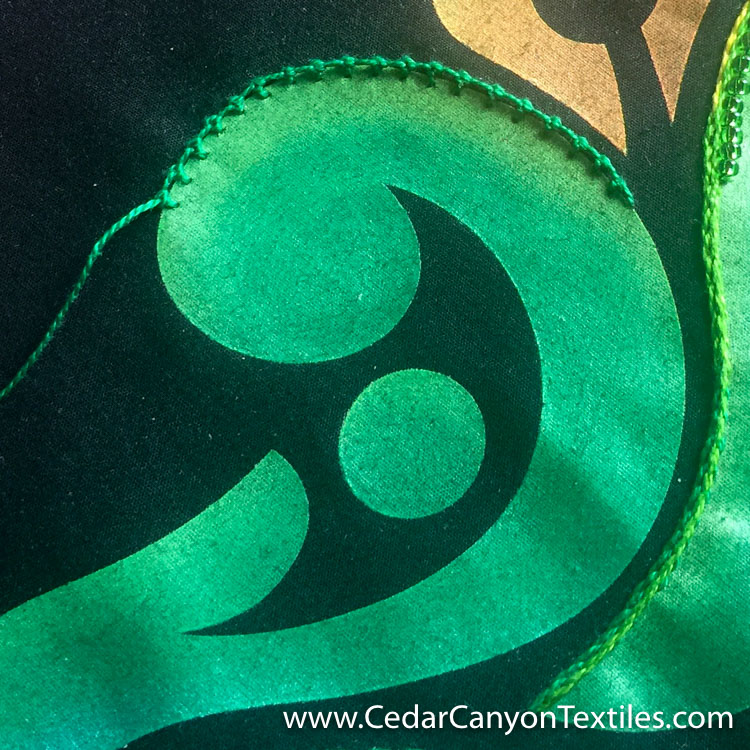
Stitch a line of Palestrina Knots
Before moving on to a “real” project, I decided to do an experiment on my doodle cloth. I stitched a line of Palestrina Knots along the edge of one shape, with the stitches getting closer together as I progressed.
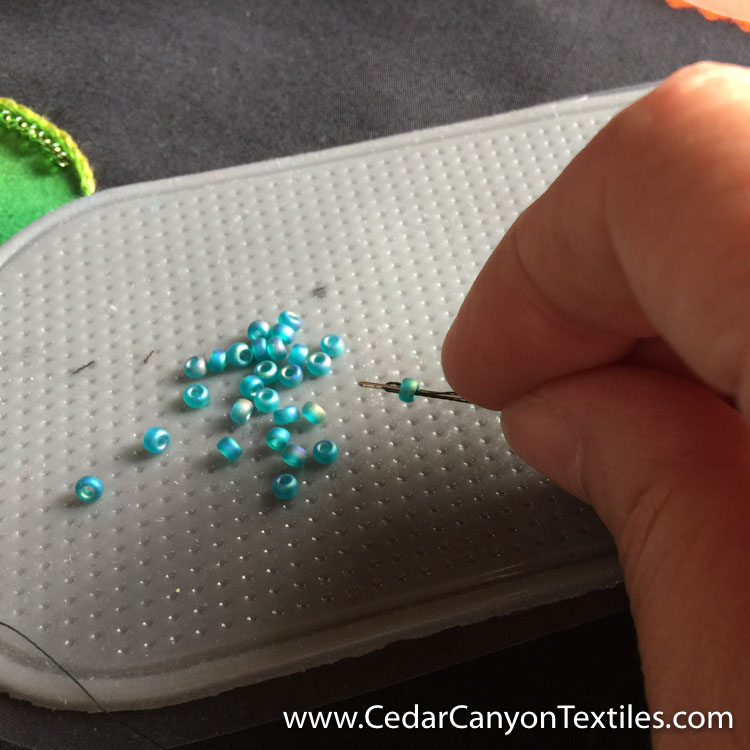
Pick up beads one at a time
Getting from Palestrina Knots to Beaded Palestrina Knots was quite easy. Or perhaps I should say it was quite easy using my rather unconventional methods!
I threaded a small needle with Silamide beading thread using a color that would blend in with the stitching and background. After bringing the needle up from the back side of the project, I picked up one bead…

Run the needle under the leg of the next knot
Ran the needle under the leg of the knot…
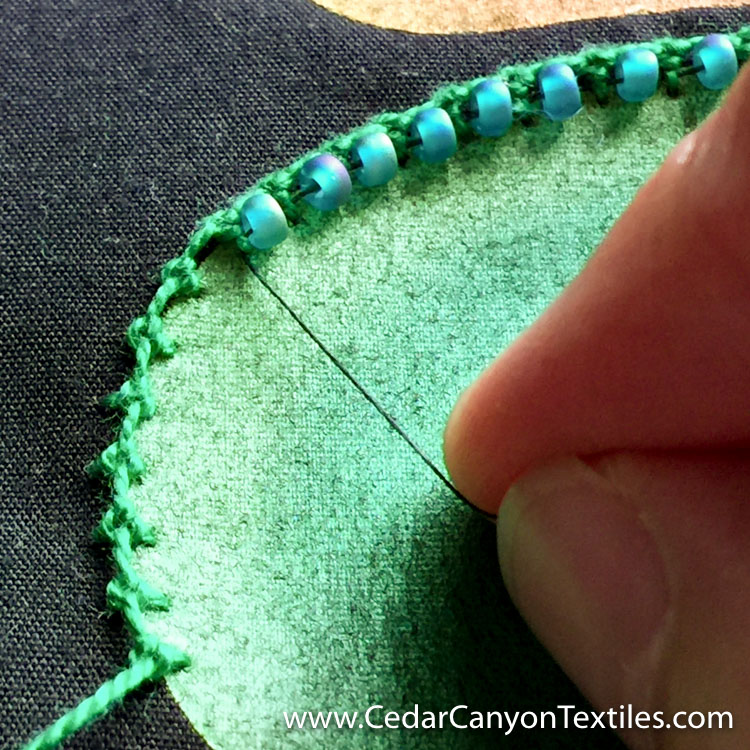
Pull on the thread (gently) to move the bead into place
And pulled the thread gently. Just as I expected, the bead snuggled in between the adjacent knots for a very nice look.
When I got to the end of the line of stitching, I took my needle to the back side of the fabric, made sure it was pulled snugly (but not too tight!) and knotted it off.
In Search of Goldilocks
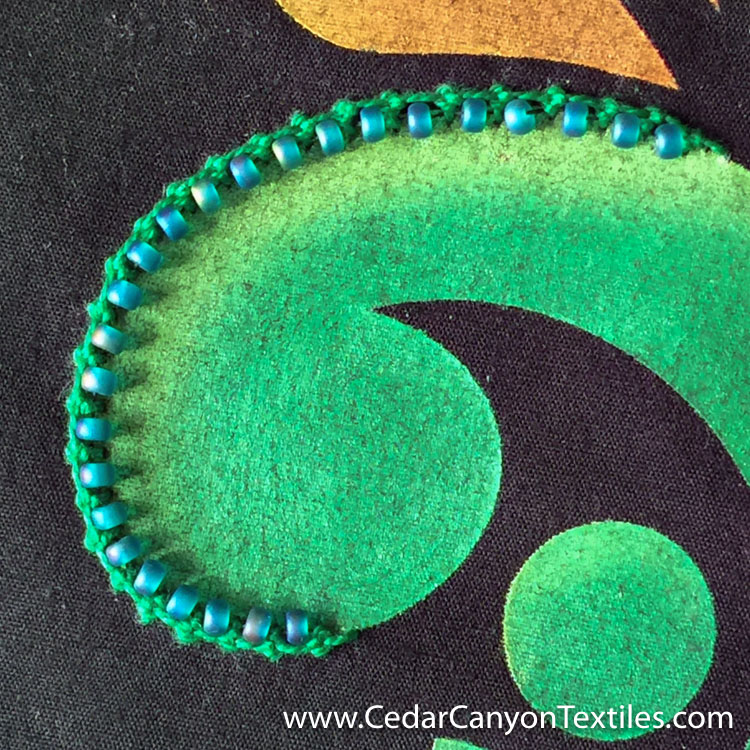
This was a quick experiment, but I learned something really important – It’s all in the spacing!
If the knots are too close together, the beads can’t snuggle in close to the line of stitching. If the knots are too far apart, the beads are not supported and they can look a bit sloppy.
If you look at the top right corner of this photo, you’ll see that the stitches are a little too far apart. The spacing is much more pleasing in the lower left corner where there’s just enough room for the bead to slip in between the knots.
On the flip side, scroll back to that First Attempt photo earlier in the post. Now that you know what you’re looking for, can you see how those stitches are too close together?
For the best looking Beaded Palestrina Knots, we have to find our Goldilocks stitch distance. Not too close, not too far apart. It’s all about finding that often elusive “Just Right.”
Other Options
If you are like me, experiments like this will have your Art Brain turning cartwheels! What about…
- Beads to the outside of the curve instead of the inside
- Beads on Both Sides of the stitching line
- Larger or smaller beads (or both!)
- Contrasting color beads instead of a matching/coordinating color
Oh goodness, the possibilities are endless! Are we allowed to have this much fun?
More Beaded Embroidery Stitches
If you love the idea of adding beads to your embroidery, check out:
Add Texture and Sparkle with Beaded Back Stitch
And, if you are in need of a video on how to make the Palestrina Knots, check out this video from Mary Corbet at NeedleNThread.com.
Your Turn
Do you see something I haven’t thought about for this Beaded Palestrina Knot stitch? Chime in with a comment. I’d love to hear your suggestions!
I really like the look of texture and can think of several uses for this technique. Handbags, pockets, wall hangings, etc.
Thanks for such detailed explanations.
Judy
Thanks Shelly for these great ideas. Beaded embroidery is my favorite thing to do! Joy
It’s pretty high on my list too, Joy!
I used to do a lot of hand embroidery but have never heard of the Palestina stitch. I love it, and the beading looks gorgeous all nestled in between the stitches. Hmmmm….I can see where this could be addictive!
There are so many stitches, it’s hard to keep track of them. I feel like I’ve only scratched the surface. Mary Corbet calls it Palestrina Stitch. Sue Spargo calls it Palestrina Knots. Whatever the name, it’s a lovely stitch that can take on a lot of different looks. ?
All I know is there aren’t enough hours in a day to accomplish a sliver of what I would like to do. And yet you tease us with yet another beautiful and creative path. I have beads, I know how to make a stencil, I have paint. All I need is a block of time. Maybe they have this in the Subscribe and Save option. I guess I will put it on the list of creative adventures yet to be done.
I know all about not having enough hours, Janine! But that’s the joy of our crafts. There will be a day when the chunk of time appears. It will all be waiting for you.
Shelly… this is just what I needed to finish a project that I’m working on! Thank you so much! I know that you are making wonderful art in your new home… but you are really missed here! Congrats on your anniversary!
Yay! I’m delighted that the beading lesson works for you, Shelli. By the way, we are still in Minnesota, at least for a while. The real estate gods are not smiling on me just yet. You might just have to come for a visit. 😉