
Journal
Add Zip To Your Zippers With Custom Vinyl Stencils

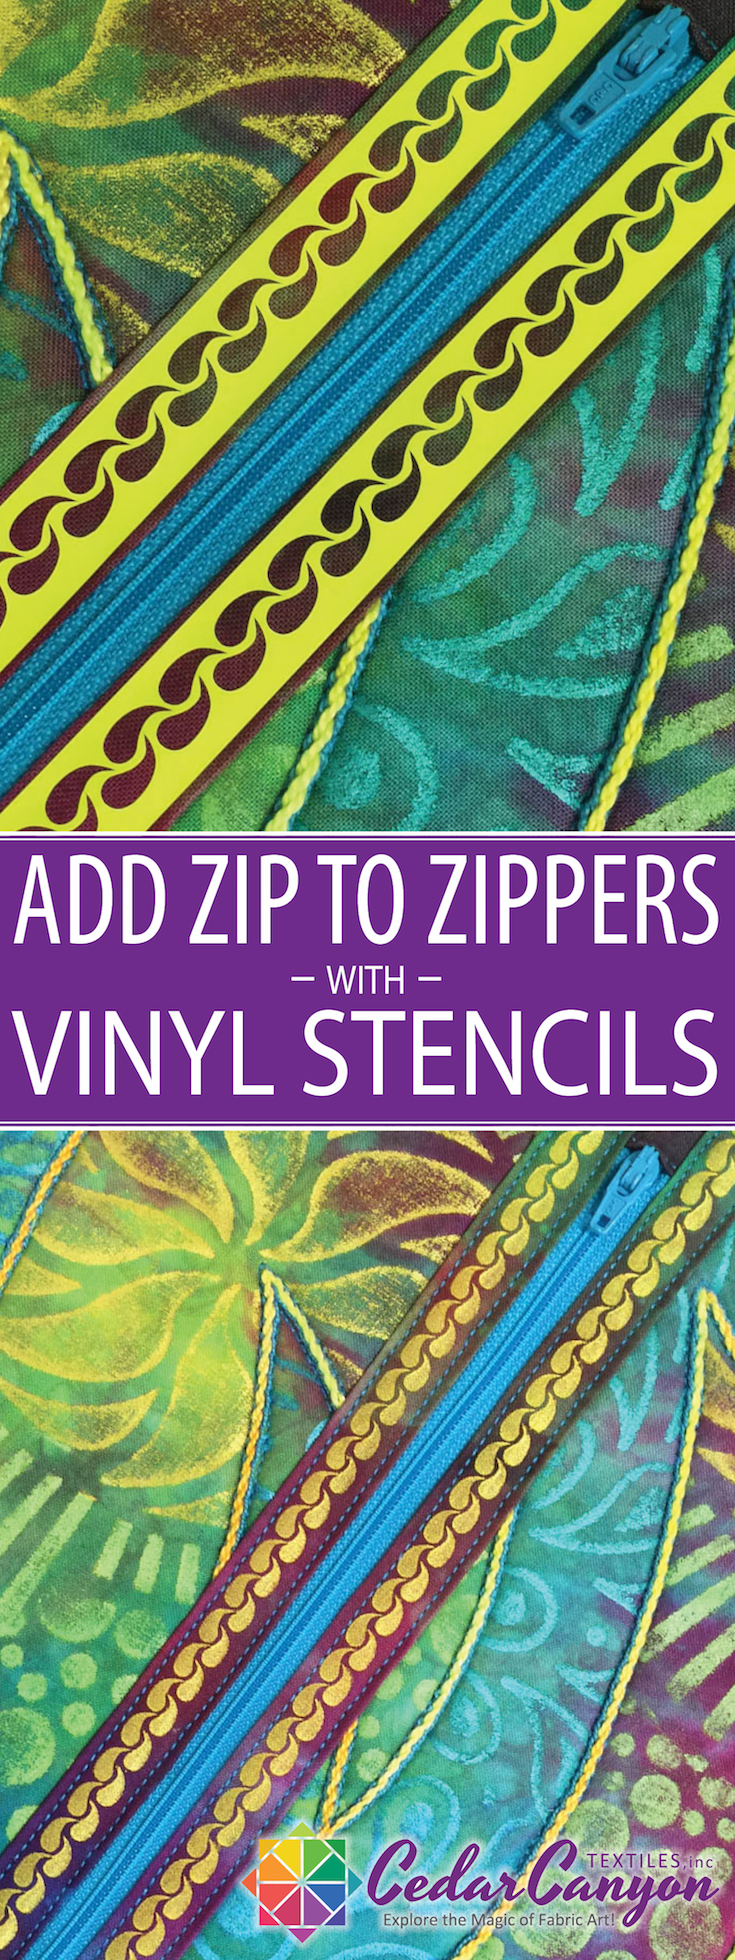
Several weeks ago, I was working on my Urban Computer Satchel. After I added the facing strips to the zipper on the front of the bag, Art Brain called a time-out and tossed the whole thing squarely into Project Purgatory. She (Art Brain) was Not Happy with those little facing strips!
To rescue a project from purgatory, I almost always send Art Brain off for a nap and call on Engineer Brain for help. In this case, Engineer Brain decided to tackle the problem with Custom Vinyl Stencils. (For the record, Engineer Brain needed a few days to come up with this bright idea.)
[Tweet “Rescue a tote from Project Purgatory with custom vinyl stencils.”]

From this photo, you can see why Art Brain was pouting. The facing strips for the zippers were boring. As in Very Boring. They were cut from the same fabric I used for the painted panels, but they looked glaringly out of place. (Art Brain is pretty smart, even if she is a pain in the fanny!)
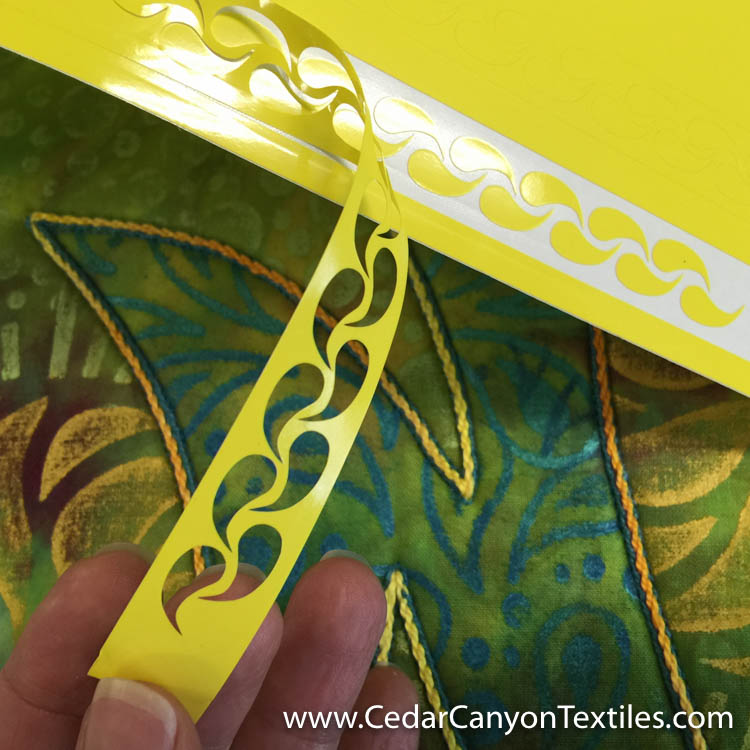
My first inclination was to add a series of dots to liven things up. But when I looked closely at the painted fabric, I decided on the tear-drop shapes. After a bit of playing in the Silhouette Studio design software, I designed and cut two strips of “tape” full of tear-drop shapes from sticky-back sign maker’s vinyl. Cool!

Well, almost cool. When I applied the vinyl tape to the zipper facing, it was too wide. I could see the edge stitching peeking through some of the teardrop shapes. Back to the Silhouette software to make it smaller.
After carefully measuring the space between the stitching lines, I shrunk the tape down to a smaller size. I wasn’t sure the stencil would hold together with the design elements so tiny and close together, but it worked.

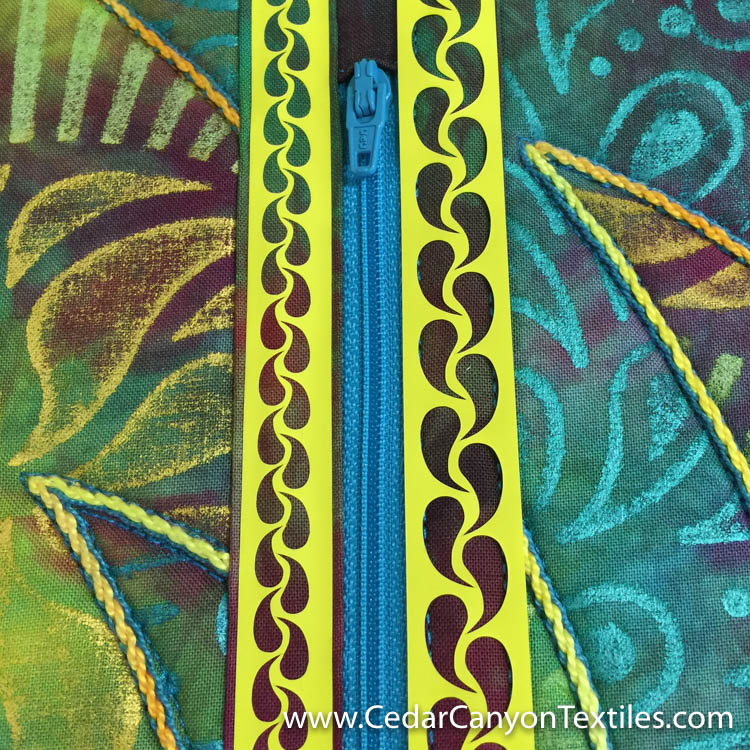
I was a bit paranoid about adding paint in the middle of a project. I had a lot of hours into this already, and I didn’t want to make a mess. I added masking tape to the sides of my stencils and in the middle over the zipper.
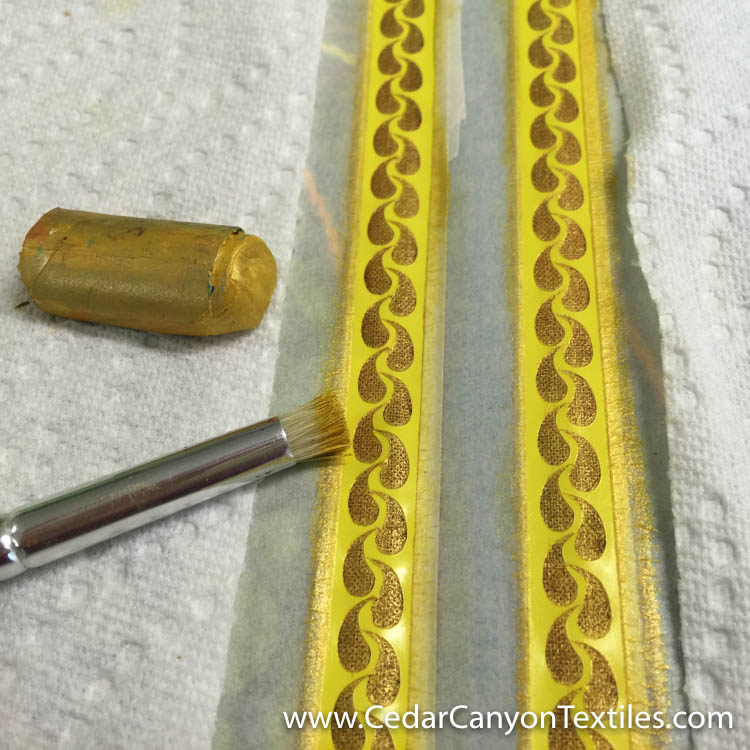
With everything covered up, I painted the rows of tear-drop shapes with Light Gold Iridescent Paintstik color.
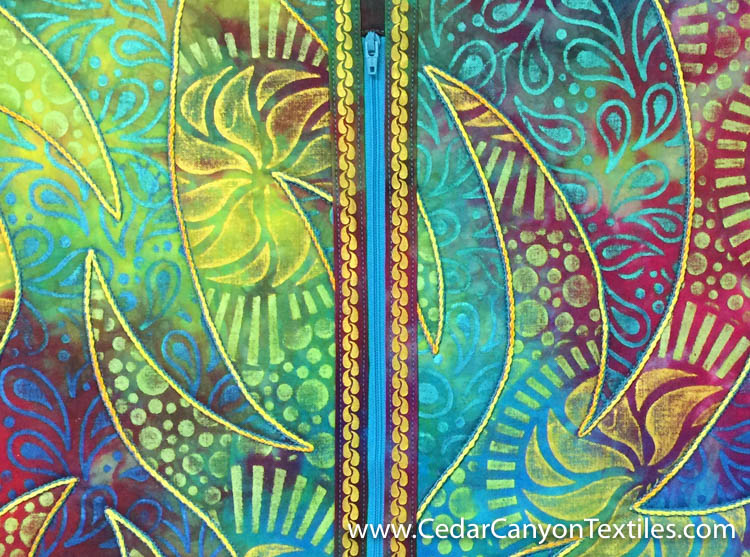
As always, I had a twinge of anxiety when it was time to peel up the stencils. But, lucky for me, I loved the results. The tiny tear-drops are not exactly perfect, but they look great on my zipper facing strips! Best of all, Art Brain was happy. I guess she likes “bling” better than “boring.”
With a bit of luck, I’ll be able to finish my computer satchel without another interlude in project purgatory. I’ll do my best to keep Art Brain happy along the way.
[Tweet “Need tiny design elements? Cut custom vinyl stencils with Silhouette.”]
Designing and Cutting Custom Vinyl Stencils
Until I got my Silhouette cutter, vinyl was not on my list of stencil materials. But I have to say it’s pretty cool stuff! With vinyl, we can cut super-detailed designs — and move them over to fabric without worrying about stretching or distortion. Plus, we can break the traditional rules of stencil design.
This renegade method for making custom vinyl stencils will be a part of the Silhouette 101 for Fabric Art class that starts at the beginning of June. Registration will open shortly, so stay tuned for more!
Your Turn
Have you played with vinyl as a stencil material? Did you find it easy or frustrating to work with? Chime in with a comment below. I love to hear what’s on your mind.
I have 13 Christmas stockings made and need to place a name on each cuff for each person. I’m hoping to use the Silhouette and paint sticks. Using the vinyl for the lettering sounds really wonderful to me. Can’t wait for your class. Right now I have the Silhouette set up in my sewing room and am afraid to touch it. Talk about a silly person! Will see you at the Minnesota show. Hope fully I can purchase what I need there.
Vinyl will be perfect for your stockings, Susan.
You are not alone in the “I’m afraid to touch my machine” group. LOTS of people feel that way — and the best way to get over it is to find some step-by-step instruction. See you in class!
Hi Shelly,
How do you fix the paint with the zipper so close to the design?
BTW, I love your blog.
Good question, Aviva. If you wait long enough, the paint does not have to be heat set. It will dry completely on it’s own. In this case, I’ll cover the bag front with a press cloth and give it a good heat setting before I go further in the construction process. Zippers are pretty sturdy and I’ll be careful not to press the edge of the iron down onto the zipper teeth.
I love what you are doing with your Silhouette! Having been on the bubble about justifying the purchase of one of my own, I am leaning in the ownership direction. Keep up the good work!
Thanks, Alice. I’m having way too much fun! After letting my machine sit idle for a couple of years (with the exception of a couple of times using it), I feel like I’m finally making it a part of my everyday toolbox. It certainly opens up a lot of options!
Shelly , you are way too funny and while having fun. The zipper looks great. Can’t wait too see the bag?
What? Am I the only crazy person who has to send her art brain off for a timeout??? Tell me it’s not so! ?
I bought one years ago and used it quite a bit but then got a new embrodery machine and the cutter became old news. I’m not interested in card making or scrap booking so the uses have been stenciling on fabric for quilts. Unfortunately, my good ideas far outnumber the time available. I’ve used contact paper for stenciling. What’s the difference between that and vinyl?
I need to go back and re-learn the machine.
The vinyl is similar to contact paper, Carolyn. I suspect the vinyl I’m using is stickier, but I would have to test them side by side to check it out. As for time and ideas? I’m right there with you. I won’t live nearly long enough!
What a great idea! I’m looking forward to your next class!!
It’s a keeper, Susan. See you in class shortly! ?
Hi Shelly,
Oh, what a good idea for dressing up a zipper. Glad to see another idea for the Silhouette and so great to hear you’ll be offering a dedicated class to using it! I look forward to learning with you again.
This is too funny, Kate. Who knew my most popular blog posts would be about zippers? We’ll definitely tackle this in class. Lots of fun ahead!