
Journal
Beaded Embroidery Update

For the past few weeks, I’ve been adding beads to my current Paint+Stitch+Bead project. This project has turned into a bit of a stitch sampler and a test for my beaded embroidery stitches. Here’s the current update along with links to some of my previous posts.

Beaded Palestrina Knots
Beads fit nicely into Palestrina Knots, so long as I don’t work the stitches too close together. This is a versatile stitch for adding beads as they can be added on either side of the stitching line.

Beaded Portuguese Knotted Stem Stitch
I love the Portuguese Knotted Stem Stitch, but adding beads was challenging. This is one that deserves another round of experiments for attaching the beads. I think I was making it harder than it needed to be.

Beaded Stem Stitch (with Pekinese Wrap)
Adding beads to my Pekinese Stem Stitch was pretty straight forward. I used exactly the same Pekinese wrap for the beads that I used to wrap the initial line of stem stitch.
The beading revealed that my stitch length was not always consistent. I was a little disappointed until my friend Sue pointed out that a varied stitch length could be used strategically. (Don’t you just love friends who can find the silver lining in your mistakes?)
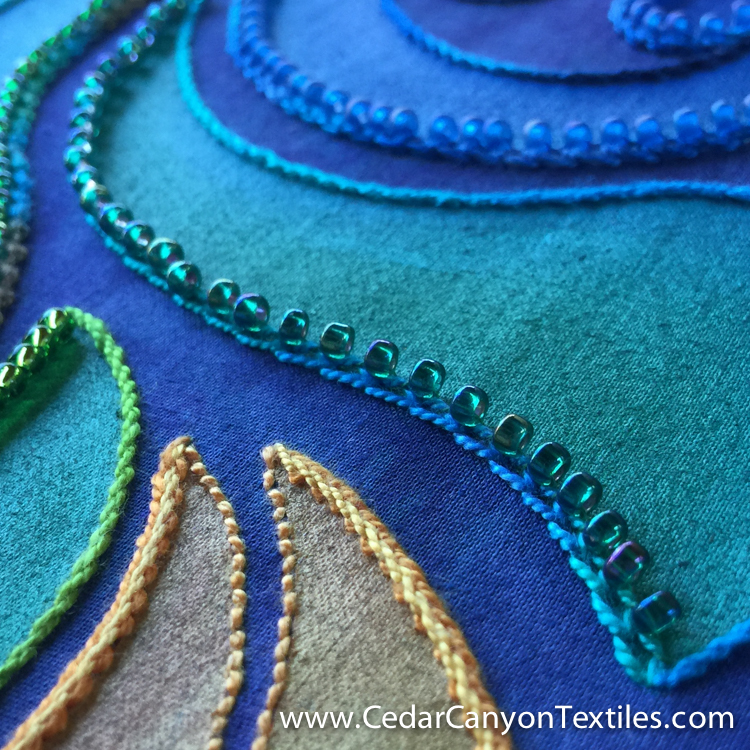
Beaded Chain Stitch
A Chain Stitch offers several options for beading. In my initial Beaded Chain Stitch post, I showed you how to add beads by wrapping the thread under both sides of the chain. On this piece, I wrapped the thread under one side of the chain, but not both.
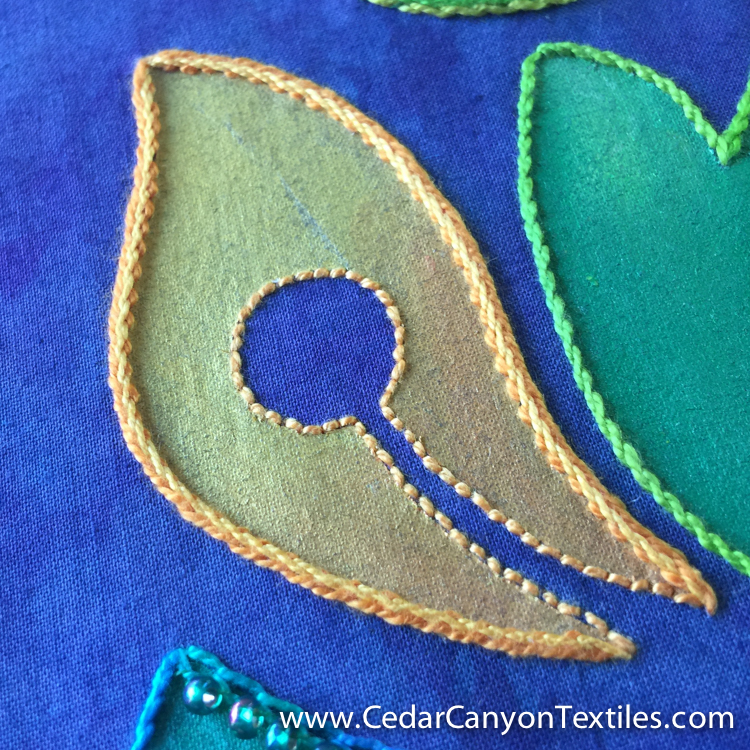
Yet to be beaded flowers
I’m not quite sure what I’m going to do with the flowers. I want to change things up rather than adding lines of beads along the outline. At the moment, I’m considering a smattering of smaller beads for a different look. As always, I think I’ll test this out on my doodle cloth. (I’m always paranoid about sticking needles through my painted shapes unless I’m absolutely sure it’s what I want to do!)
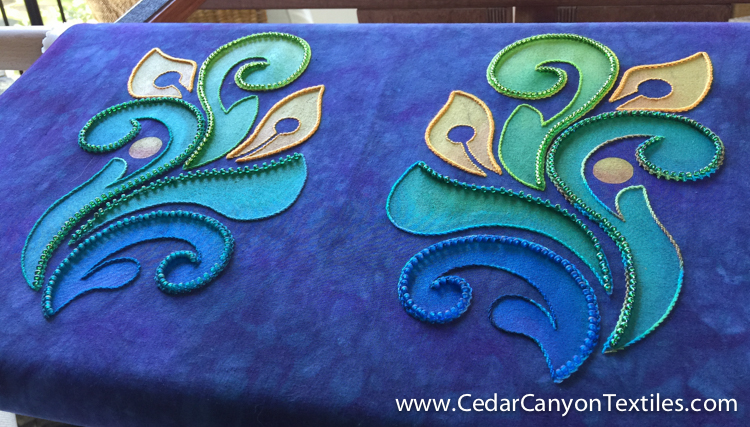
Beaded embroidery by Shelly Stokes
All in all, I’m thrilled with the way this is shaping up. The beads add even more dimension to the piece, and the sparkle of the beads looks fabulous with the iridescent paint. I’m excited to finish up with this experiment and move on to my next big project!
Your Turn
How do you like the beads with the embroidery stitches? Would you attach the beads to the fabric instead of the stitches? I’m always curious to hear your reactions. Leave a comment below and let’s chat.
I love the dimension that the stitching gives the pattern. The added dimension of the beads is amazing!
Thanks, Lauren. The more I play with this, the better I like it. The extra dimension is great.
Shelly I love that you included the beads with the stitches! Beads add so much to surface design and they look marvelous on yours. Thanks for sharing and as always, I look forward to more of your creative good stuff.
Thanks, Debbie. I’m glad you enjoy peeking over my shoulder. I have the most fun when I’m exploring something a bit new. Not a totally new craft, but ways to add more zing to what I’m already doing. 🙂
Hi Shelly; After the class on fabric art last summer, you asked for ideas of future classes. I would love to explore more Silhouette designed stencils with the addition of embroidery both with and without beads. Your work is inspiring. Joy
Thanks, Joy. Paint+Stitch+Beads is definitely on the agenda. I just need a bit more time to create something that will serve as a proper class project. My personal experiments are not the best starting point for teaching something to others.
I love the way your project is evolving. I do beaded jewelry and have put a few beads on wall quilting, but nothing like this. Wow is all I can say. I love the stitching. I have just started embroidering a red sun bonnet sue quilt after many years away from embroidery. Hum my pattern may be changed. Thank you for sharing.
Thanks, Barbara. I’m happy with my project too! The issue I see is with turning the beaded designs into quilts. I’m perfectly happy for them to be embroideries rather than quilts, but it begs the question of whether these pieces can become quilts as we obviously can’t run the beads through a sewing machine. Another creative dilemma!
Is there a YouTube or other video to see how you get the beads in place so consistently?
Sorry Katheryn, no videos yet. If you click on the links back to previous articles, you can see the step by step beading process. Yes, there will be classes at some point, but not just yet. I’m still learning!
If both texture and depth is your visual goal, I say add the beads to the stitches. Personally, the depth you have created is quite unique….. To quilt these projects, a solution is to quilt the layers first, adding the stitches and beads for a unique 3-D embellishment, afterwards. What fascinating art quilts these embellishment techniques offers! How does the light play when your pieces are displayed vertically?
Thanks for your suggestions, Elizabeth. Quilting first is not a great option as it would be near impossible to accomplish the embroidery, let alone the beading. It may be possible to add the beads after the quilting, but that would require some interesting work arounds. I’m still learning to do this on a single layer, so I’ll leave that option alone for now.
Large scale pieces may not be an issue, as there can be enough room between the design motifs to run a piece (carefully) through the machine. For small pieces, I expect I expect I’m going to have to resort to (gasp!) hand quilting –– or simply leaving them as embroideries.
Shelly, by the way, I hope you will offer an advanced Silhouette class in 2018 on Kaleido-Designs. It sounds like you had a great response when you presented the concept this month.